
ASSIGNMENT
For this assignment we had to build up our own tools (container for molding, vacuum bag set up, frames, matrix, recipients) and process for our workflow, with any machine of the fab lab or manually. 3D dimensional geometries and the technique used to make them were of special importance. We had to make samples of our composite with standard dimensions : 13x17cm minimum and maximum 40x40cm, either flat or formed on a 3D dimensional surface. We had to experiment with: Fabric Formwork (lycra, leggings, geotextile, any fabric plaster, microconcrete, fiberglass fibers, natural cotton fibers, hydraulic concrete, liquid marble); Wood+Textile Composite (Veneer wood, flexible wood White glue Fabric); Crystallization.
INSPIRATION
Because we had 3 different assignments, I had different inspiration threads for each material experimentation. Initially, instead of working with crystals I decided to work with a composite Fabric + Bioplastic , and I was inspired by the work of Clara Davis and Maria Viftrup. Both these designers have come up with interesting variations on theme with bioplastics, with amazing results.

For the Wood + Textile, I looked at geometric designs that could add structure to the softness of fabric while at the same time maintain a degree of geometric flexibility. The work of Diego Vencato has both organic structures inspired by the Voronoi, as well as very angular cuts, which are my absolute preference :)

Finally, for the Fabric Formwork, I was inspired by architectural work using once again the Voronoi structure, as well as concrete casting modalities that were developed as part of a study at University of California by Culver and Sarafian (see here). Both create a sense of weightlessness and grace that I didn't imagine concrete could achieve. I also fell in love with the potential od concrete to mimick the softness of fabric, like in the work of Annie Locke Scherer (see here).

OBJECTIVES & PLAN
My objective is to experiment and create a few samples with:
- Fabric + Bioplastic
- Wood + Fabric
- Lycra + Microconcrete

felt + bioplastic
For this experiment, I used some leftover tiles from my seamless pattern assignment on Week 3. They were the hexagonal ones without the hinges I laser cut in my mistake trial, and the turquoise felt is so beautiful I didn't want to waste them :)
INGREDIENTS
- Felt hexagonal tiles
- Gelatine
- Glycerol
- Metal Tray
- Water
- Pot
- Stove
- Measuring cups


PROCEDURE
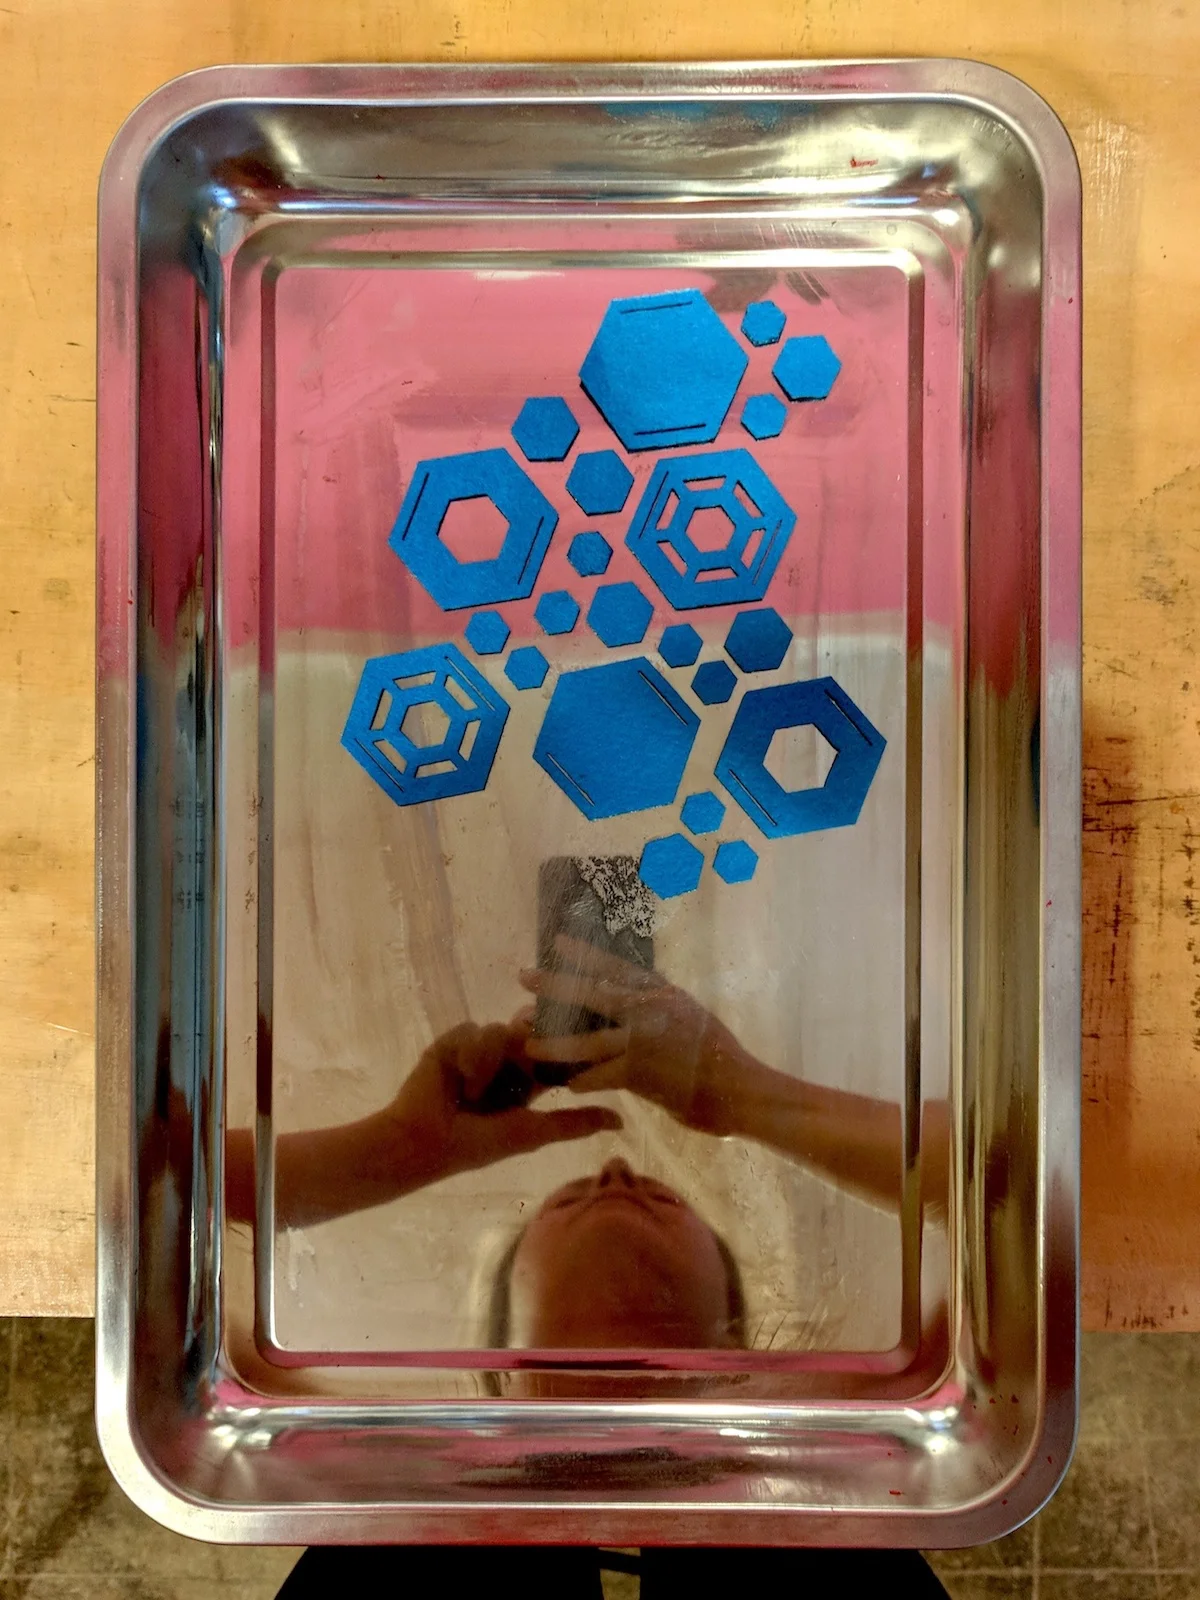
First of all, I laid out the hexagonal felt tiles on the metal tray, creating a nice design. I also used the small hexagonal leftovers which created a cool movement.
Then, I proceeded to make the bioplastic, according to the recipe from Clara Davis, in the same way I did it on Week 2. The ratio I used was the following
- 960 ml cold water
- 192 g gelatin powder
- 48 g glycerol

Since I wanted to obtain a transparent bioplastic, I removed the layer of foam that formed on the top of the bioplastics I was heating it up. This reduces the amount of bioplastic substantially, so keep that in mind when planning the dose :)


RESULTS & REFLECTIONS
The final result was quite nice: the bioplastic came out really transparent, and the felt tiles stood out very nicely, as if suspended in the air. Sadly, after a couple extra days of curing, the bioplastic stared developing MOLD 0_0. Gladly, the mold was only superficial and didn't damage the bioplastic + felt sheet very much, so by using a sponge with some water I was able to remove it all.

After 2 days curing - Almost done!

After 4 days curing - MOLD :( Yucatan is just too humid..
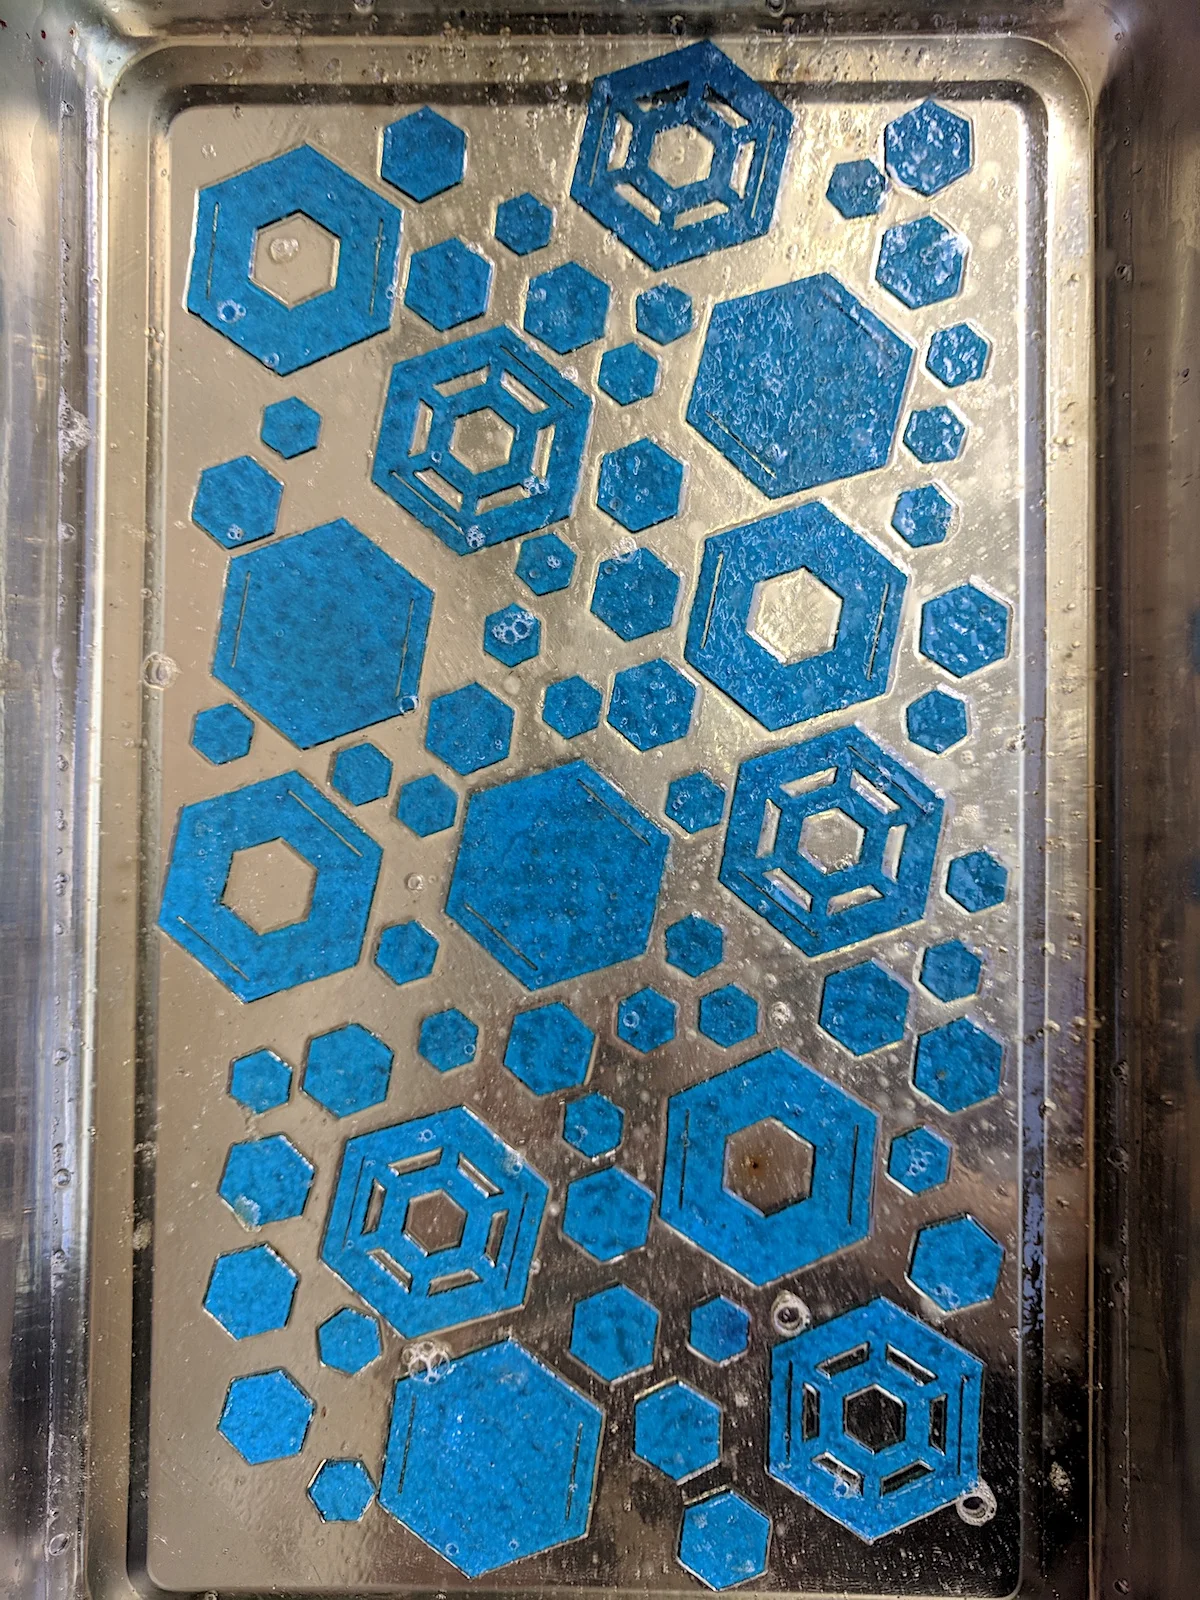
After cleaning with a sponge - Almost as good as before :)
This is my final felt + bioplastic product: a nice see through pochette. Hopefully it doesn't catch any more mold!


While preparing the Felt + Bioplastic sheet, I had some spare bioplastic so I decided to try out a variety of combinations of various types of fabrics + bioplastic. Here's a brief overview of this side experiment. I will omit the bioplastic recipe because it's exactly the same.
INGREDIENTS
- bioplastic
- felt
- felt and glitter
- denim
With these I used some old Flor de Jamaica dye from Week 4 - now very dark:
- linen
- jute
- cotton
- organza
PROCEDURE
I took some circular sample containers and placed a piece of fabric in each of them. I then poured the transparent bioplastic on them. After that I poured some Flor de Jamaic dye inside the remaining bioplastic and mixed it with a wooden rod, until the color was uniform. Then I poured the remaining dark purple bioplastic on the linen, jute, cotton and organza.
Interestingly, after the 4 days of curing only the samples with the Flor de Jamaica dyed bioplastic we SUPER MOLDY. The other ones weren't affected almost at all. I find the result quite charming, with these life colonies creating their miniature ecosystems, so here they are for the pleasure of your eyes :)

Below you can see the result respectively with (clockwise from top left):
Jute + Jamaica dyed bioplastic, Linen + Jamaica dyed bioplastic, Cotton + Jamaica dyed bioplastic, Linen shreds + Jamaica dyed bioplastic, Denim + Jamaica dyed bioplastic, Felt + Glitter + Bioplastic, Felt + Bioplastic (thicker), Felt + Bioplastic (thinner).
My favorites are the Jute and the Cotton Shreds, for their textural properties. I think that more trials with other colors and different shapes could be very attractive and more resistant.

WOOD & JUTE
My next experiment regarded creating a Wood + Jute composite. I was really keen on exploring the possibilities of wood becoming "soft" and a material for clothing,
INGREDIENTS
- Balsa wood
- Jute in Natural Color
- Resistol Glue
PROCEDURE
First of all I spread a layer of Resistol glue on the balsa wood, and let it cure for a couple minutes. At that point I laid the jute layer on top of it, making sure that it was sticking uniformly on the wood.

STEPS 1 - Source the jute and the balsa wood

STEP 4 - Let the Resistol cure for a few minutes

STEP 2 - Cut the jute to match the balsa wood's surface

STEP 5 - Make sure the jute and wood are evenly attached

STEP 3 - Apply the Resistol on the balsa wood

STEP 6 - Press the just and wood tightly together and let cure a few days
I let the Jute + Balsa Wood composite to cure for a few days, then I was ready to use it :) I had a few ideas in mind about it, and the size of the material played a big role in deciding what made more sense to make. After playing with a few ideas, the size of the material was perfect to make a vest, so vest shall it be :)
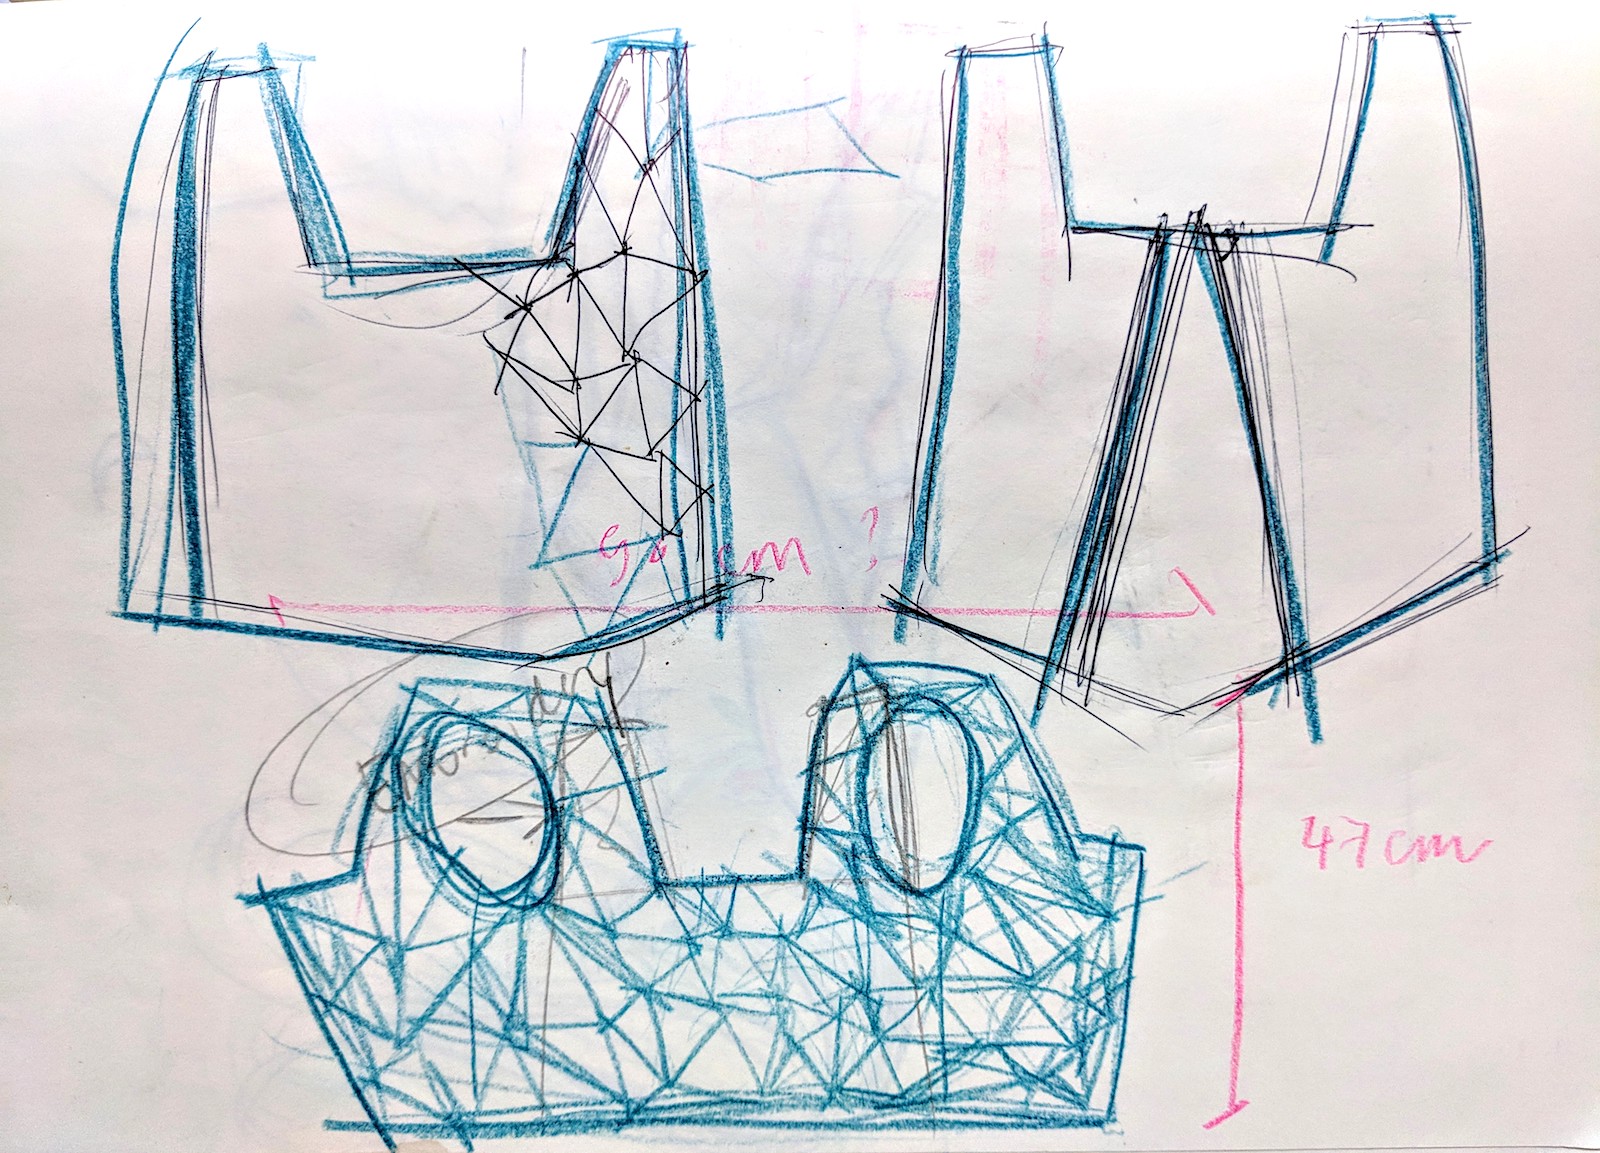
To create the design for the vest, I used Grasshopper. The definition I used is very simple and very powerful: Delaunay Edges.
This is the process to create it:
- I made the boundary edges of the vest on Rhino with the command Polyline, based on measurements taken on my body.
- Then I placed a lot of points inside the area delimited by the polyline, by using the command Multiple Points.
- I then opened Grasshopper, and created a point by using Params > Geometry > Point.
- I selected the points on Rhino and then went on Grasshopper, right clicked on the point and selected Add Multiple Points.
- I then went to Mesh > Triangulation > Delaunay Edges and connected the point to Points on the Delaunay Edges block.
- I then right clicked on the Delaunay Edges and selected Bake.
- I then cleaned the excess polylines on Rhino by deleting them.
- At this point I exported the file in .dxf to get it ready for laser cutting by going to File > Export > Export Selection.

Screenshot of the Rhino file with Grasshopper definition overlaid showing the Delaunay Edges

Screenshot of the Rhino file ready for Export.
Now the file was ready to laser cut. I imported the dxf in the xxx software and used the following parameters:
CUT
- Speed
- Intensity
ENGRAVE
- Speed
- Intensity


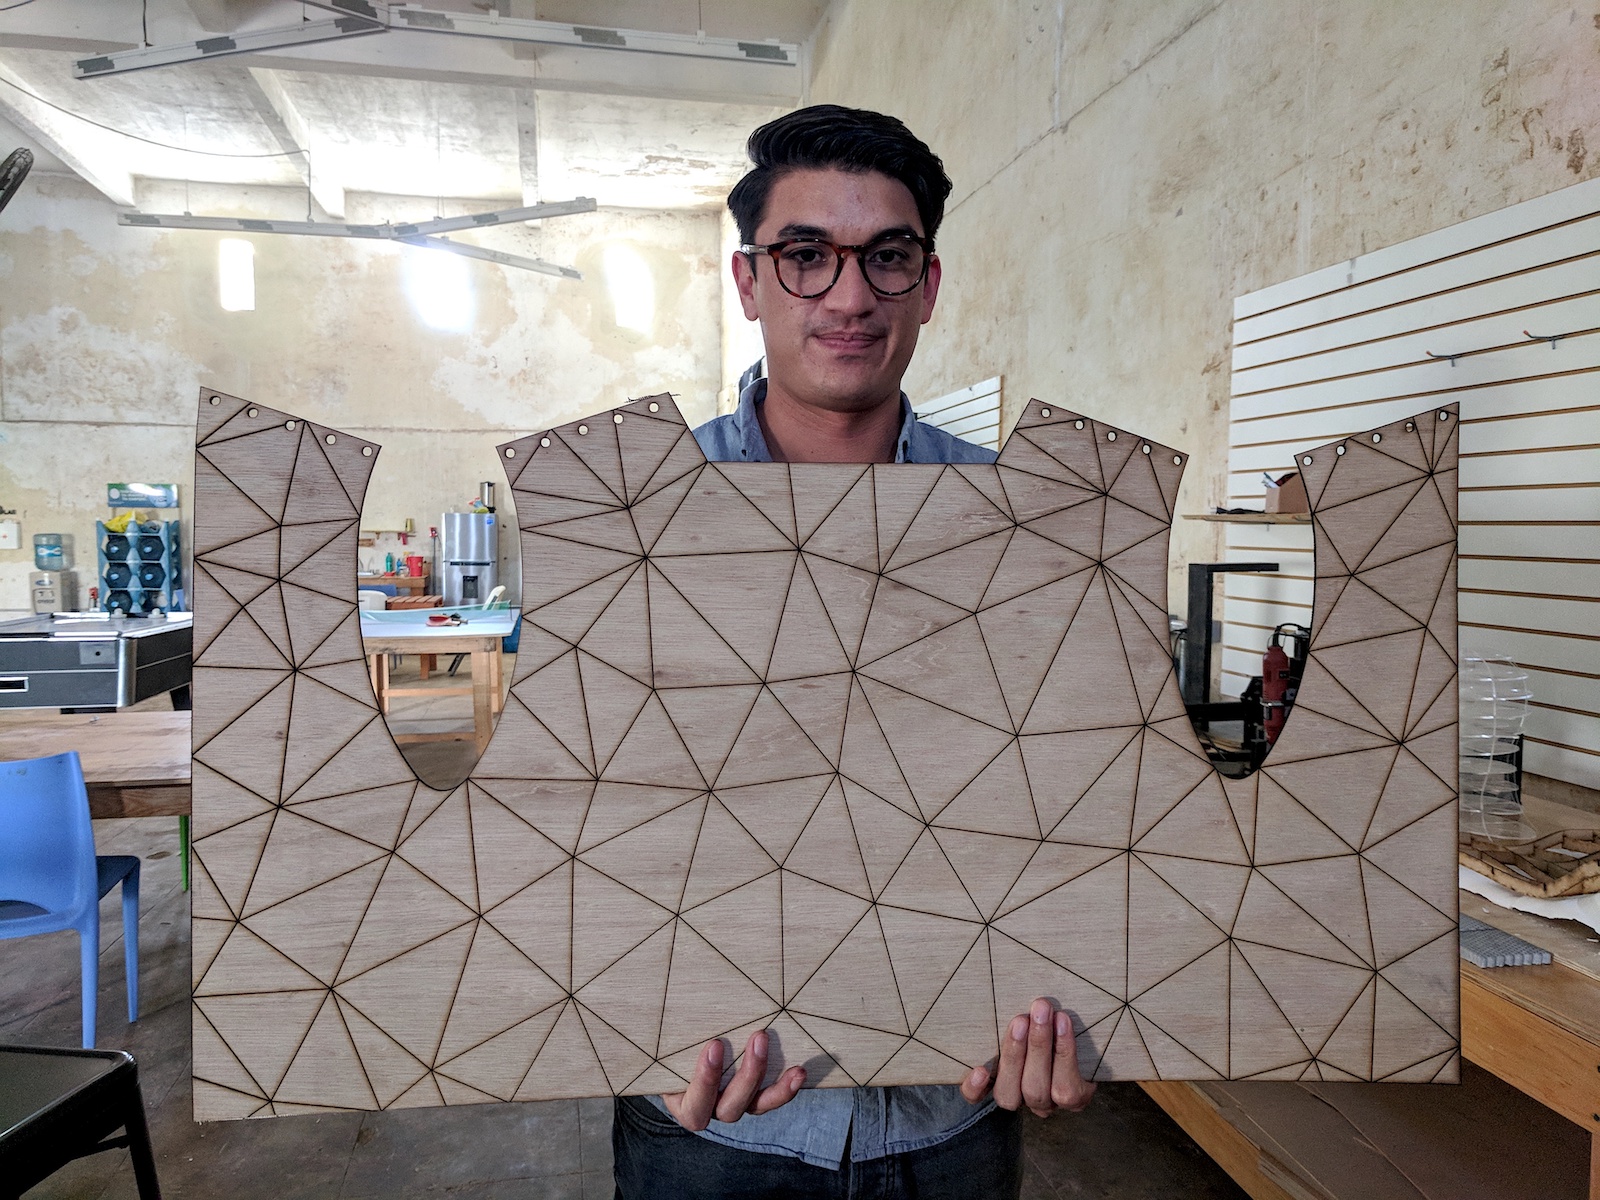
The engraving didn't cut as deep as I wished, especially it didn't go through uniformly, due to the laser cutter's bed lack of alignment. The challenge was to avoid cutting the jute as well, so the work came pretty ok yet still needed a bit of work to make the cuts fully flexible.
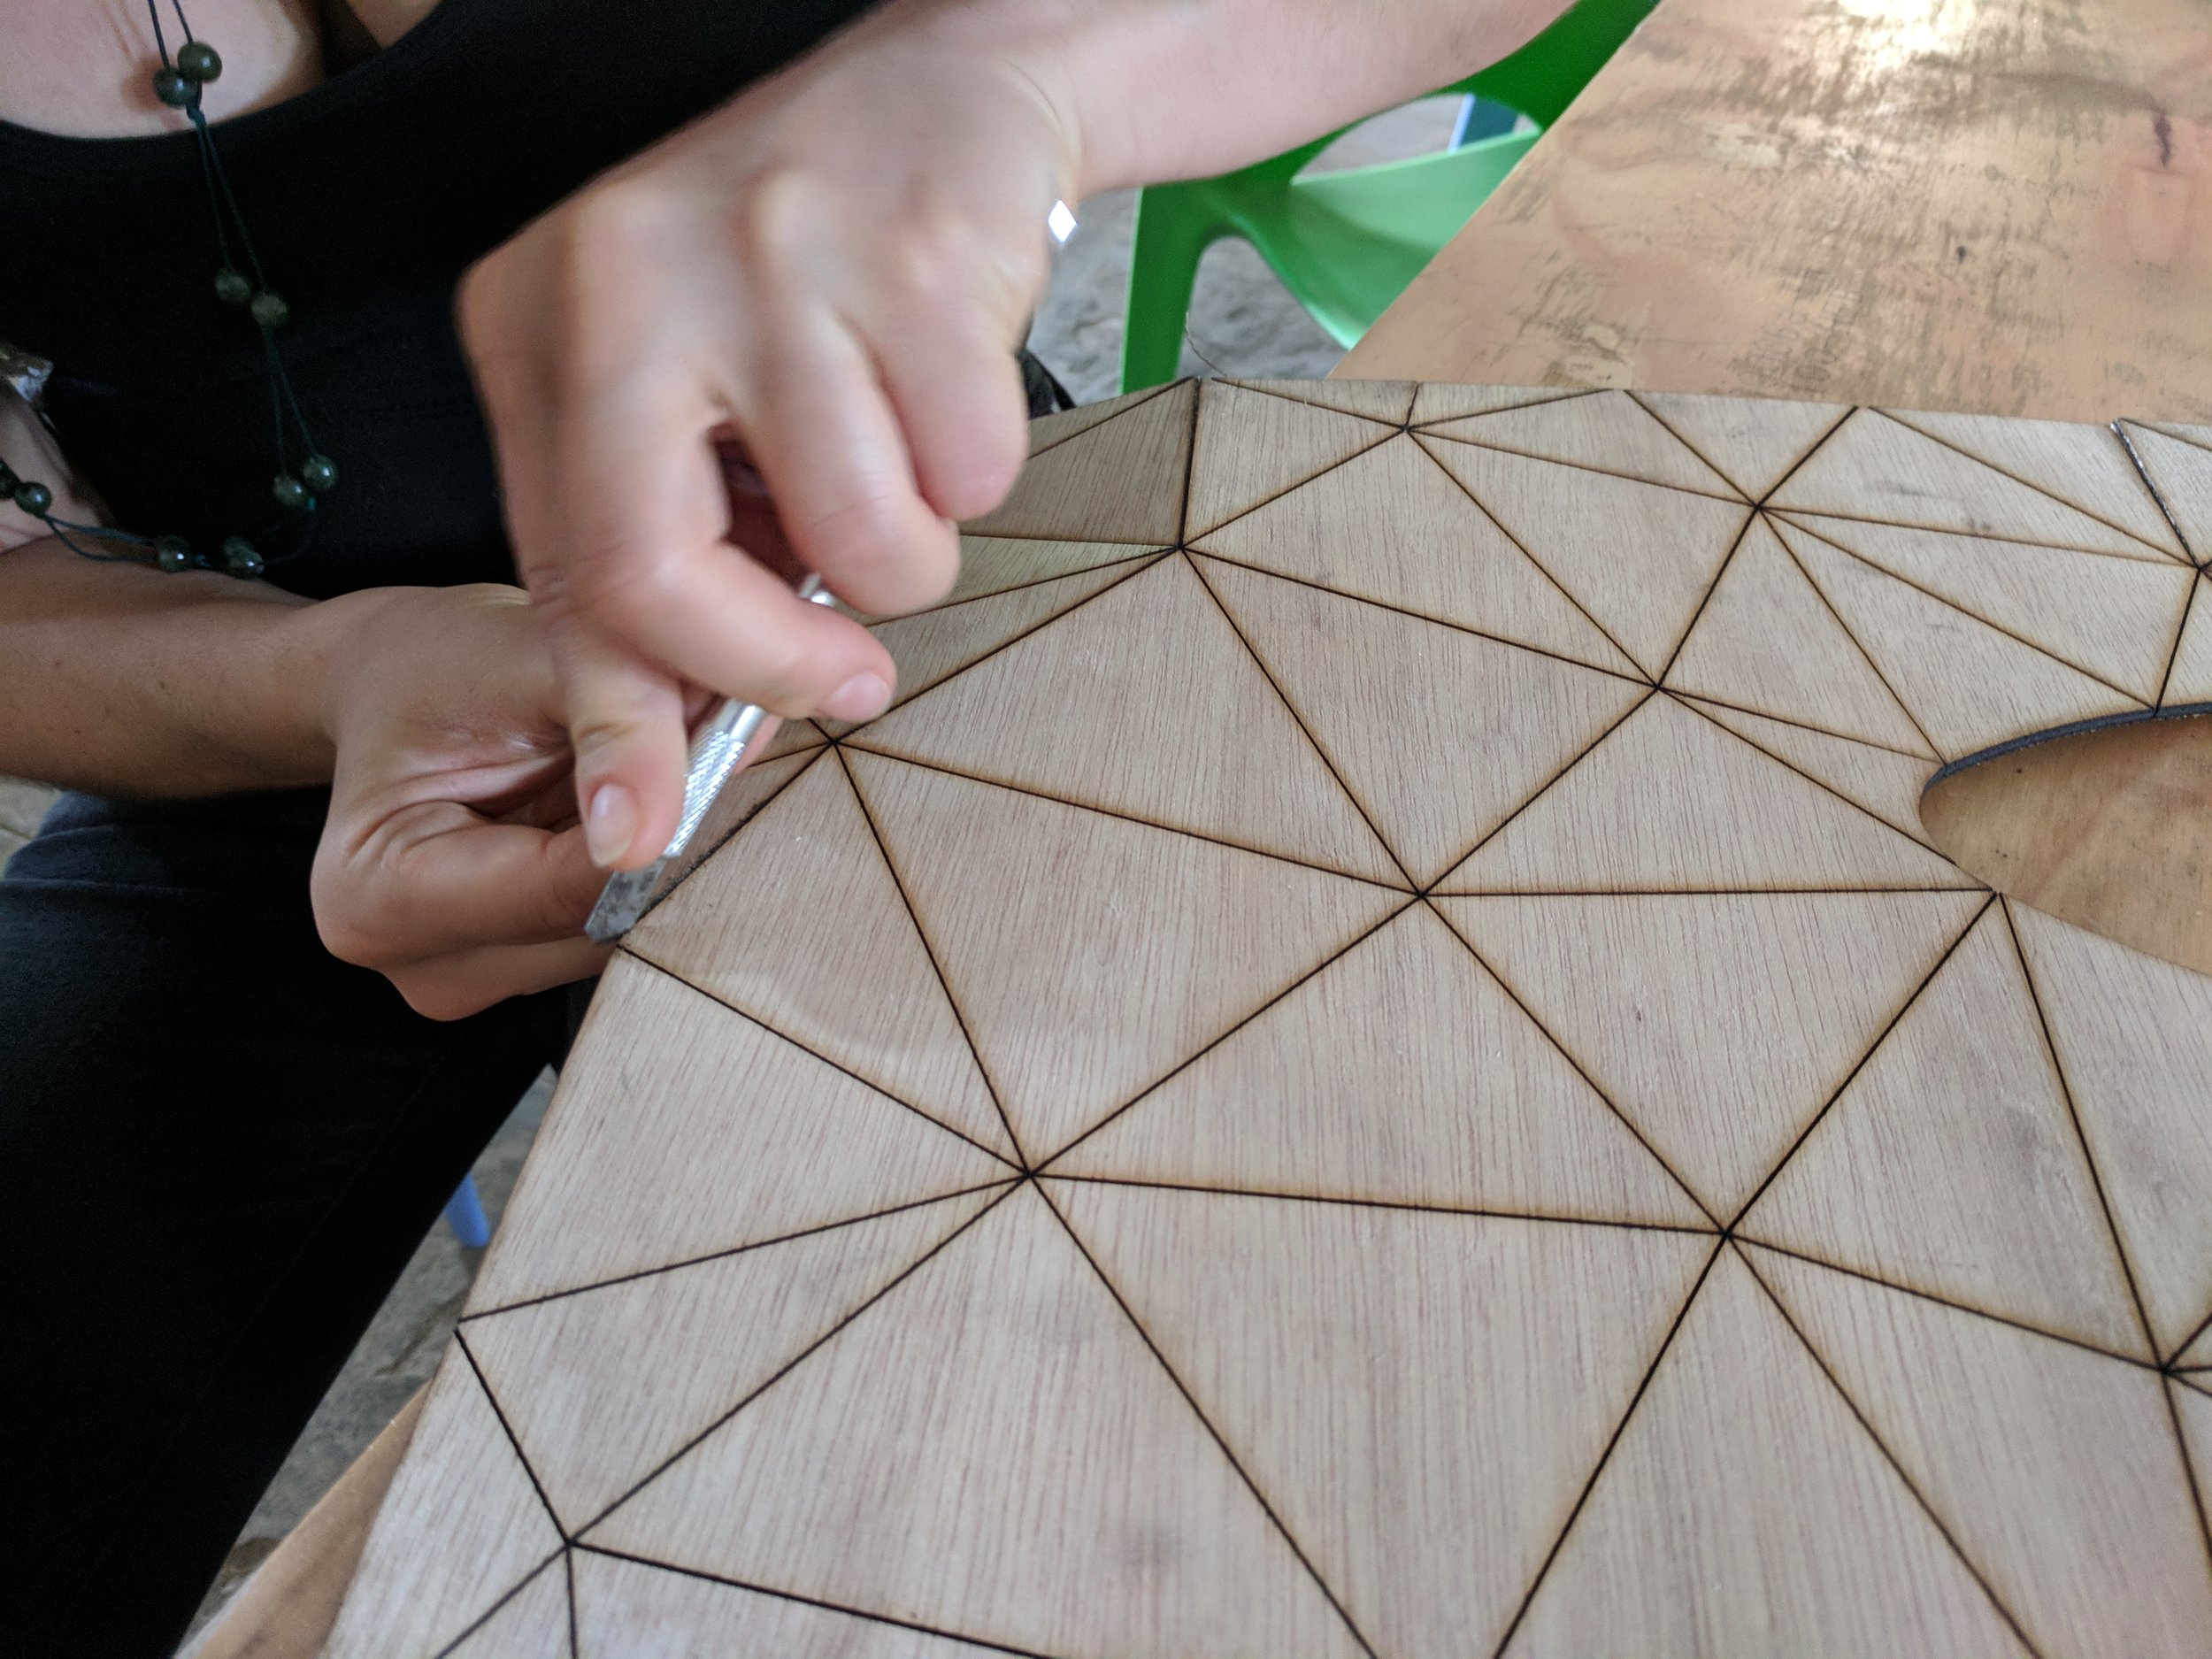

With a cutter, I deepened the cuts made by the laser cutter where it hadn't gone through the balsa wood all the way. It was a bit time consuming but worthwhile.
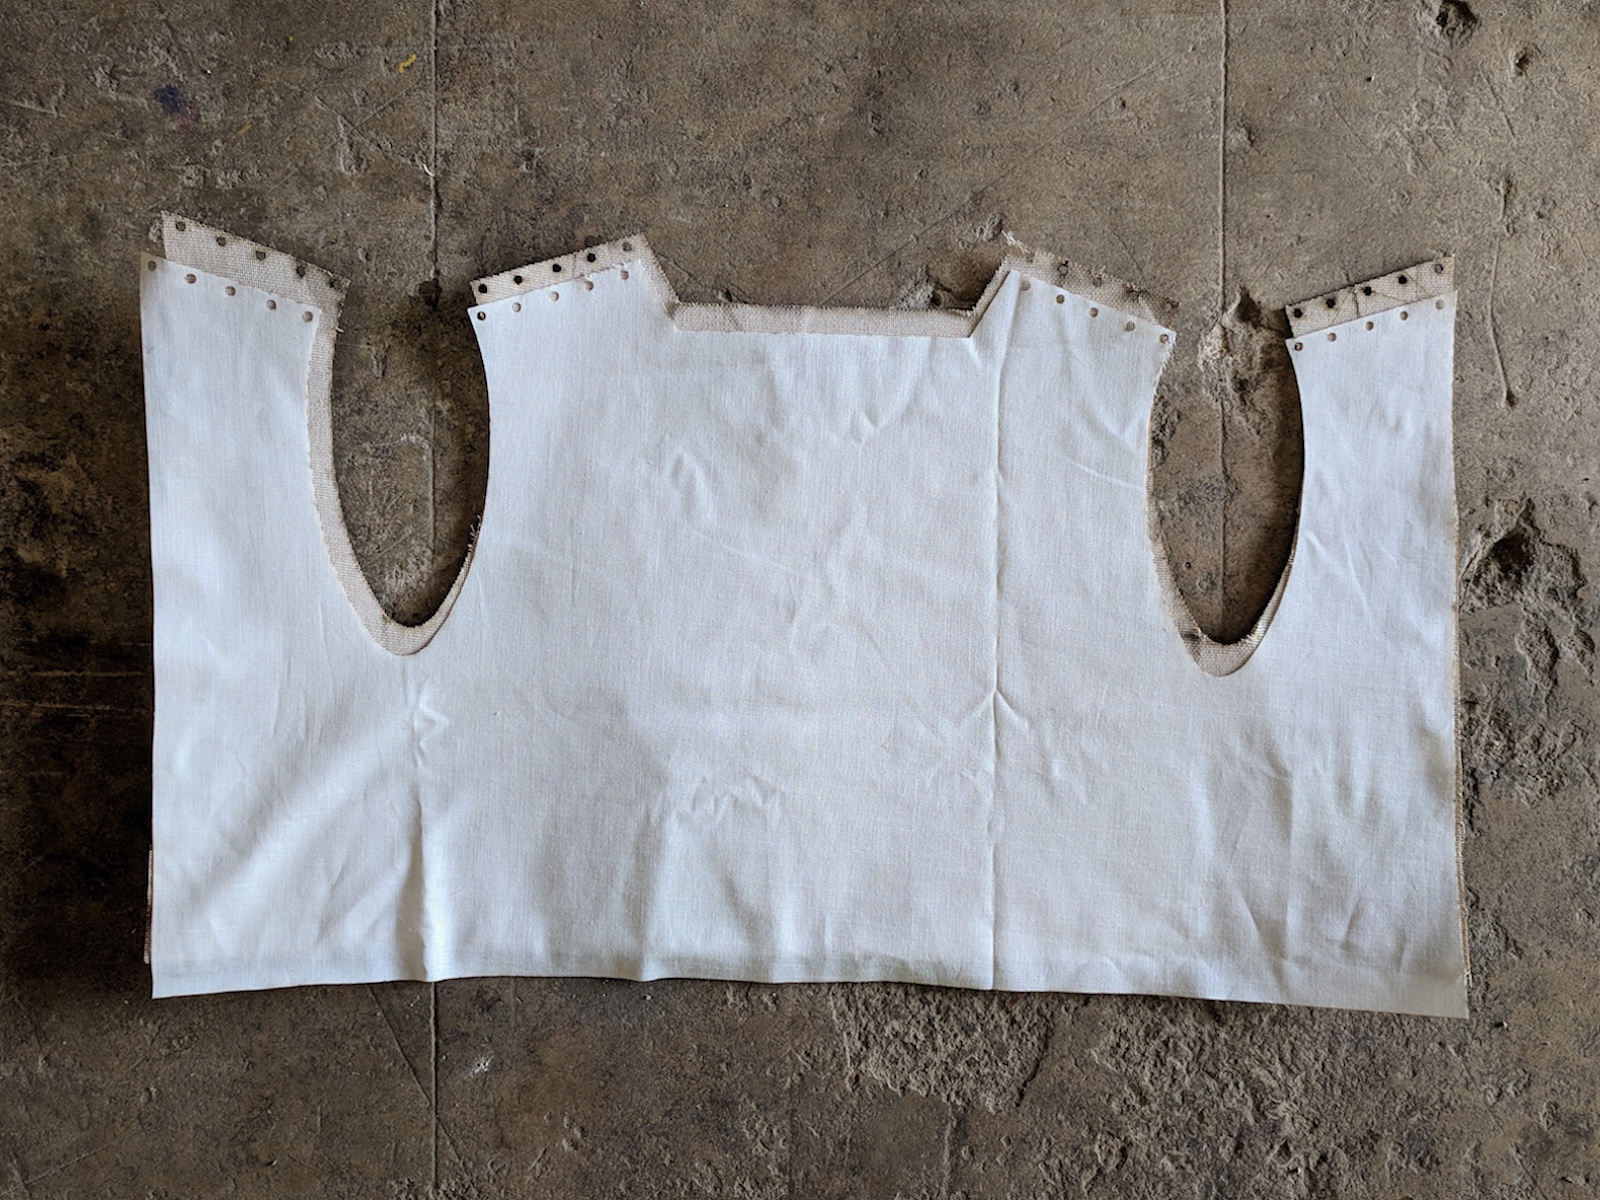
After that, I decided to add an extra layer of fabric to the lining of the vest, to ensure better stability of the garment and higher comfort. So I used the same pattern I made to cut the wooden vest eliminating the inner engraving lines, and cut a piece of linen with the following settings:
- Speed
- Intensity


After cutting the linen I was ready to glue it to the balsa wood vest so:
- I spread a uniform layer of Resistol on the inner side of the balsa wood and let it cure for a few minutes
- Once the Resistol was cured to the desired level, I laid the linen on top of it ensuring it stick uniformly on the whole surface.
- I then put the composite under some weight and let it cure for 2 days.


Here is the final product! I added some golden rings to close the shoulder top on both sides and the vest was ready for the fashion show System Recovery 2.0 :)

RESULTS & REFLECTIONS
- The vest came out very nicely and fit well on a medium size female body. It was worn during the FashionTech show held at Fablab Yucatan on December 13th, 2017 and received compliments from the audience. Yey!
- Due to the issue engraving the balsa wood all the way through, the vest was a bit rigid in some points and it would not be worn as an everyday garment.
- The learnings from this experimental prototype are that with smaller triangles in the definition, paired with a more thorough cut if the wood, would make the vest easier to wear.
LYCRA & MICROCONCRETE
For this experiment, we decided to try to different things with the combination of microconcrete and lycra scaffold: the first was a hexagonal tile resembling a pillow, the other one was a bigger wavy surface, created in Grasshopper and laser cut in MDF.
INGREDIENTS
- Microconcrete
- Water
- Wood frames
- Lycra
- Scissors
- Stapler
- Wood
PROCEDURE
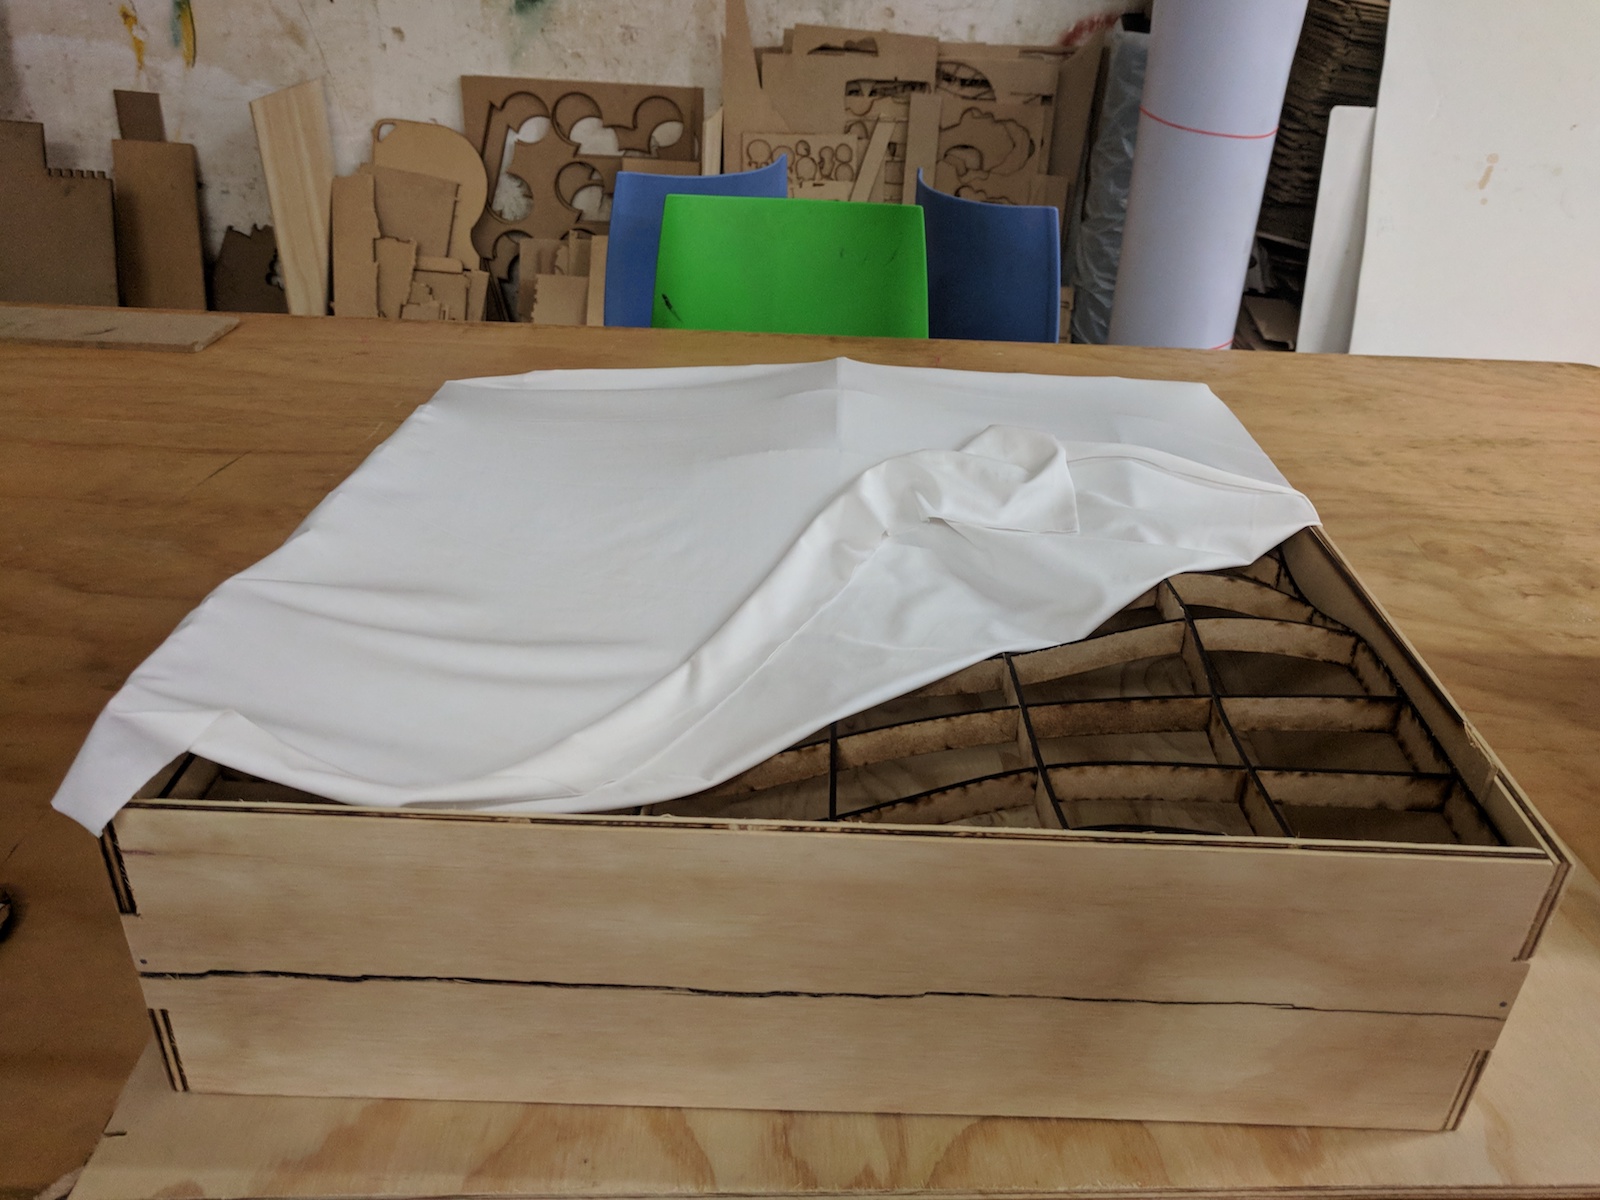
First we created the frame that would contain the wavy surface. We used the CNC mill to do so and balsa wood 8 mm thick. Once the 4 pieces were cut, we assembled them with the joint designed on each of them. In parallel we laser cut a hexagonal frame made in MDF to contain the tile.

Then we created the scaffolding, by cutting the lycra in the desired shape and fixing it on the wooden frames. In the case of the hexagonal frame (on the left in the image collage), we made some knots to get a more interesting organic shape.


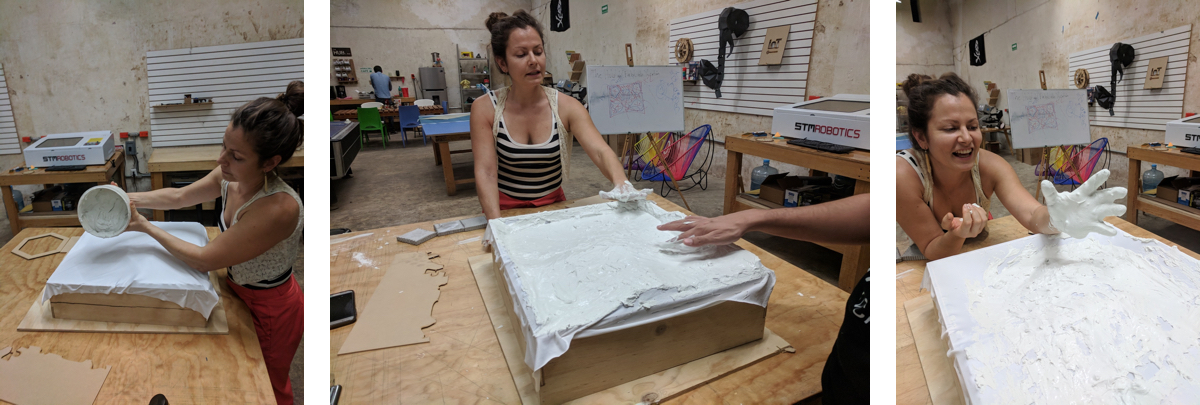
At this point, we were ready to prepare the microconcrete and put it in the molds. The microconcrete is a cement based coating, a very versatile material nowadays mostly applied to surfaces, both residential and commercial. It is easy to use and has a very fine grain, which makes it look very polished at the end.
Microconcrete is usually mixed by hand, unless the surface to cover is really huge. So we added water and mixed it with our hands until it became homogeneous. The challenge is to get rid of the bigger grains that can take some effort to smoothen. Once the mix was ready, in about 15 minutes, we poured it into the first hexagonal mold and let it dry.


We repeated the same process with the bigger surface, with the caveat that the fact that it was uneven made us use quite a lot of microcement. It was a bit wasteful but certainly a lot of fun! The only note is that where there is a bigger concentration of microcement, the surface became vey heavy and difficult to move without risking to tilt it and make a mess.
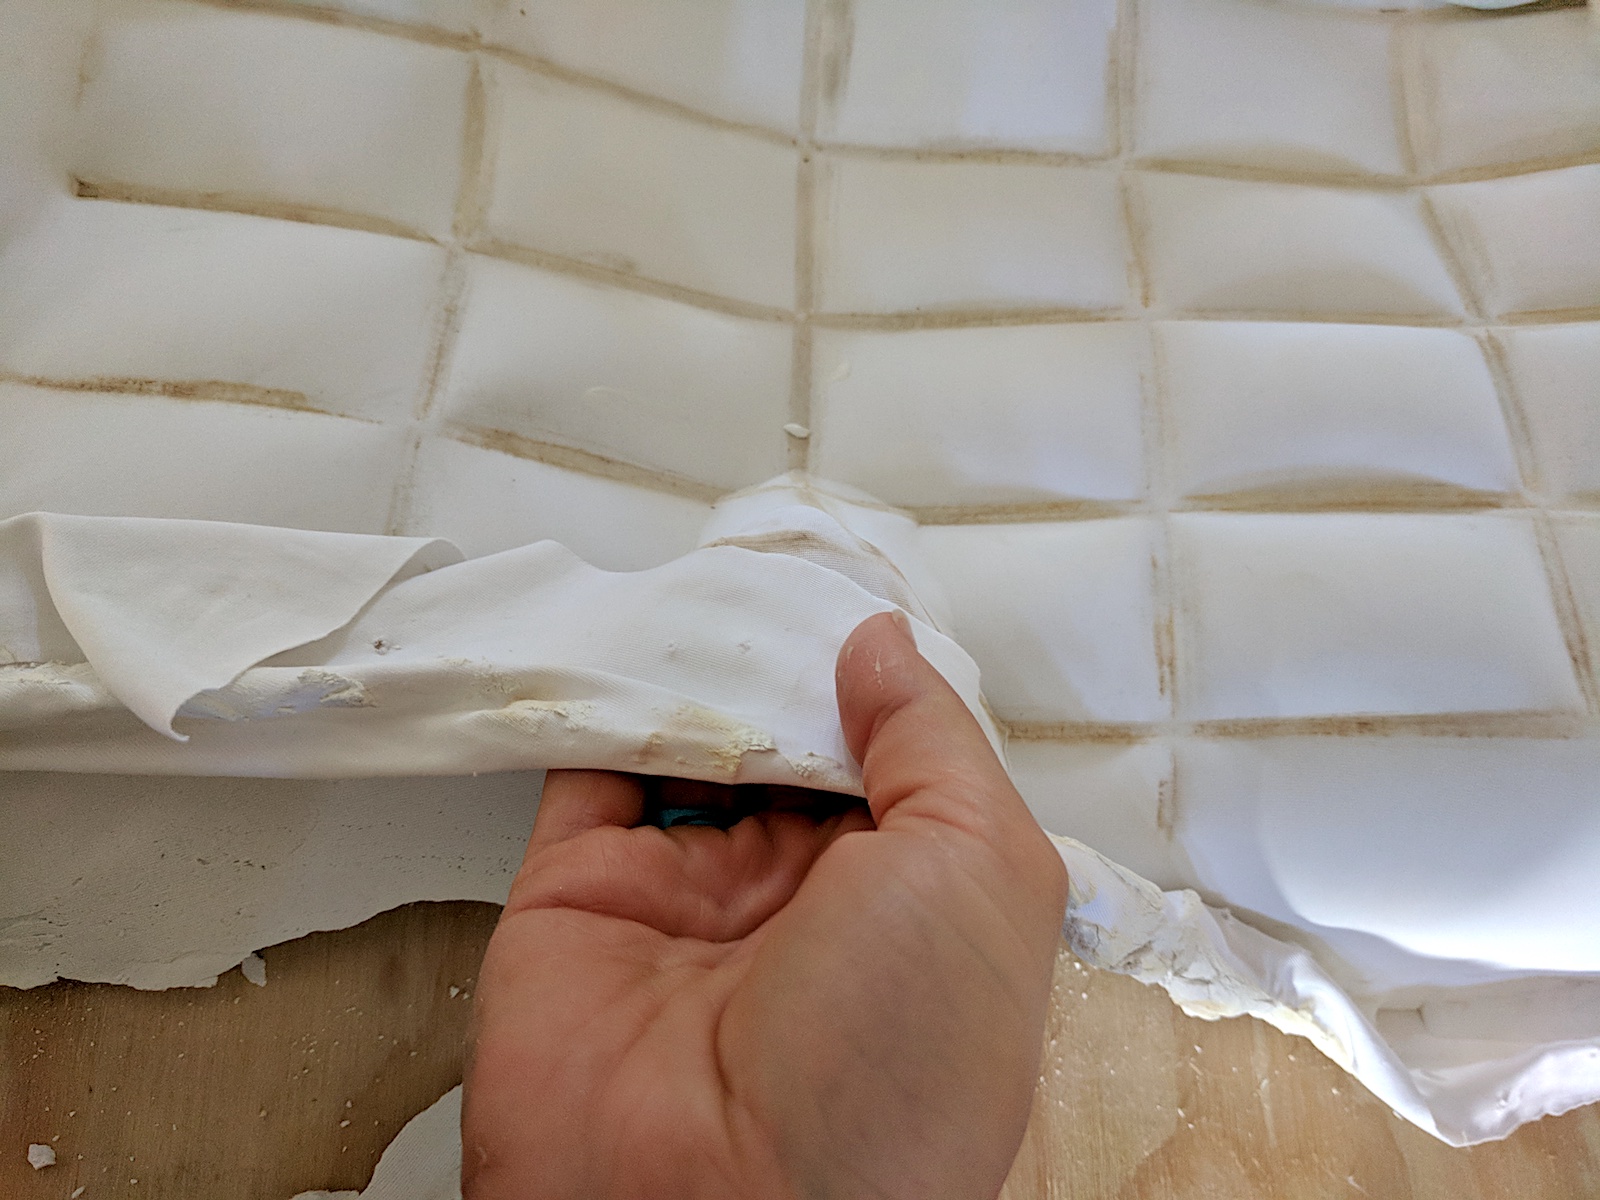
We let the microconcrete dry during the weekend, so two days and 3 nights. When we came back on Monday, it was ready to be unveiled:) We started with the hexagonal tile, and the lycra peeled off quite easily. The result is astonishing: it really looks like a soft pillow, with the texture of the lycra impressed on it.


Then we peeled the lycra off the bigger wavy surface: it was a bit harder in this case because the surface was very thin at one point, and it broke a bit. Overall the effect was astonishing and looked like a very realistic soft foam pillow that could be squeezed.


Here's a short video of the making of, showing the collaborative process and the great fun we all had.

RESULTS & REFLECTIONS
- Overall the process was pretty simple and enjoyable. The material is easy to use and the process was very straightforward.
- In the future, we will evaluate the ability of a surface to be suitable for the microconcrete. The bigger surface was a bit too uneven and it resulted in a fragile surface.