
ASSIGNMENT
The assignment for this week is to design and develop my own Grasshopper definition, in order to create 3 Dimensional patterns to 3D print. I am allowed to use various methods for 3D printing, such as rigid structures, flexible structures, 3D printing on fabrics, 3D printing performing as fabrics.
INSPIRATION
For this class, I was really inspired by reptile's skin and the possibilities of reproducing an abstraction of the piel de tolok - the iguana's skin. There are quite a few tolok - mayan for lizards that run around Fablab Yucatan's backyard. They are quite big and they captured my attention for the uneven ruggedness of their skin, a magnificent texture designed by Nature..
From a geometrical point of view, I wanted to keep some continuity with the seamless patterns I created in Week 3 , utilizing triangles and/or hexagons to design the tolok's skin. In order to gather some further visual inspiration, I created a small Pinterest board that I will enrich as we move forward.

OBJECTIVES & PLAN
The objective for this assignment is threefold:
- Learn how to master Grasshopper to create my first 3D printable designs
- 3D print my Grasshopper definition with Ninjaflex, a flexible plastic
- Reproduce with Grasshopper a pattern inspired by the tolok's skin and 3D print it in Ninjaflex

This is an example of what you can do with Grasshopper. Pretty cool right?
MAKING FRIENDS WITH GRASSHOPPER
Let's be honest, Grasshopper for Rhino is not exactly the easiest program in the world :) But I really enjoyed Aldo's tutorials and I went through a couple more in order to better familiarize with the concept of parametric design and how to apply it to my design within the realistic timeframe.
Being a newbie, I was fascinated with attractor points and pretty much just followed the tutorials step by step, without much questioning. Grasshopper for Mac has definitely some limitations but I was able to do most of the things I needed.
Fabricademy Computational Couture Lecture - I rewatched the video, slowly.. Here is the link to the video with Aldo's tutorial.
I really appreciated the clarity in which ATTRACTOR POINTS are explained, with explanation of why things are done in a certain way, as well as Spiral Design concept from Neil Gershenfeld. Definitely the tutorial was a bit beyond my newbie knowledge but very inspiring for what I can do with this application.
3D MODELING HEXAGON SURFACE
After the information overload in the lecture, I decided to go back to basic following a tutorial which explained how to build a honeycomb structure in a very basic way. I wanted to make sure that I understand the logic behind the commands and the geometric constructions, so easy does it best!
Here is the link to the first tutorial I used to familiarize with Grasshopper and start designing my own definition. The tutorial was useful to better understand booleans and extrusions and I used it for my first 3D printing trial with Ninjaflex (see more below). A bit of a recap on basic functions in Grasshopper. Maybe a bit too basic..
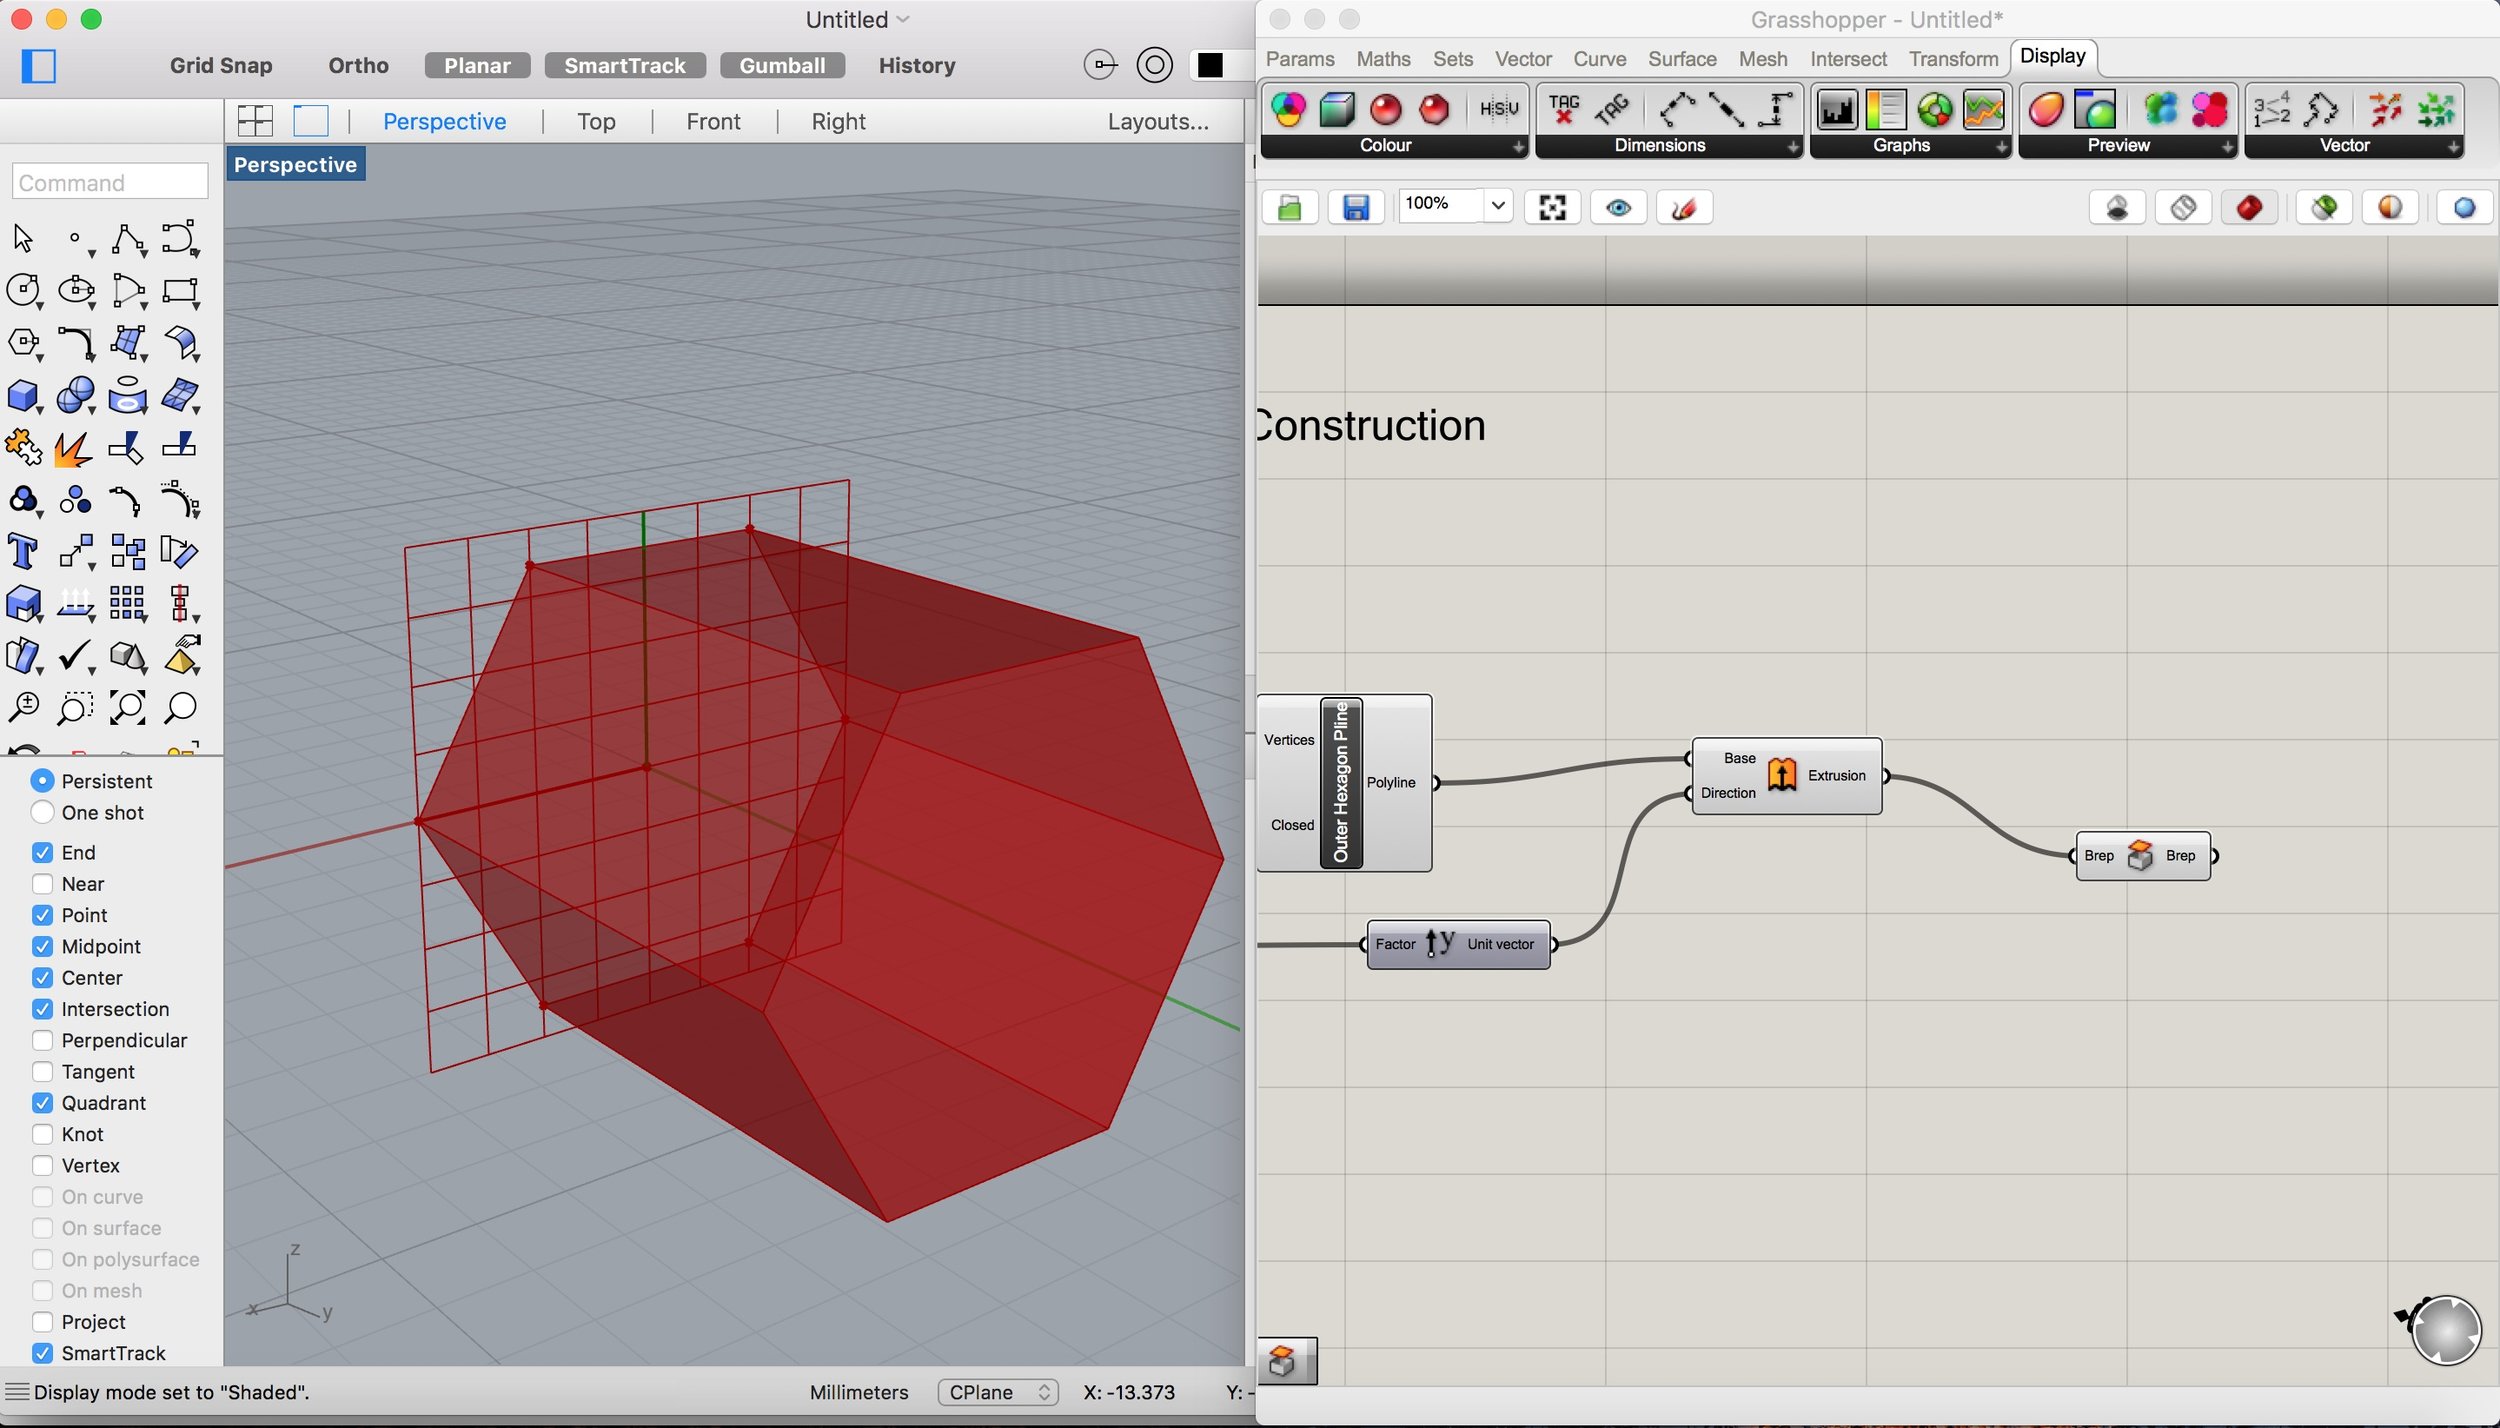
Here is the definition for the construction of a hexagon. As you can see, the polygon is created by rotating a point on an XZ plane

When the polylines are created to close the 2D polygon, you use the command Surface > Extrude to create a 3D solid
I made a Curve > Offset to create the inner hexagon and then a Surface > Freeform > Loft to extrude it. Then I create an Inside Geometry and an Outside Geometry, assigning them respectively to the Inner Hexagonal solid and the Outer one. With Intersect > Shape > Solid Difference I cut a hole in the Outer Hexagonal solid.
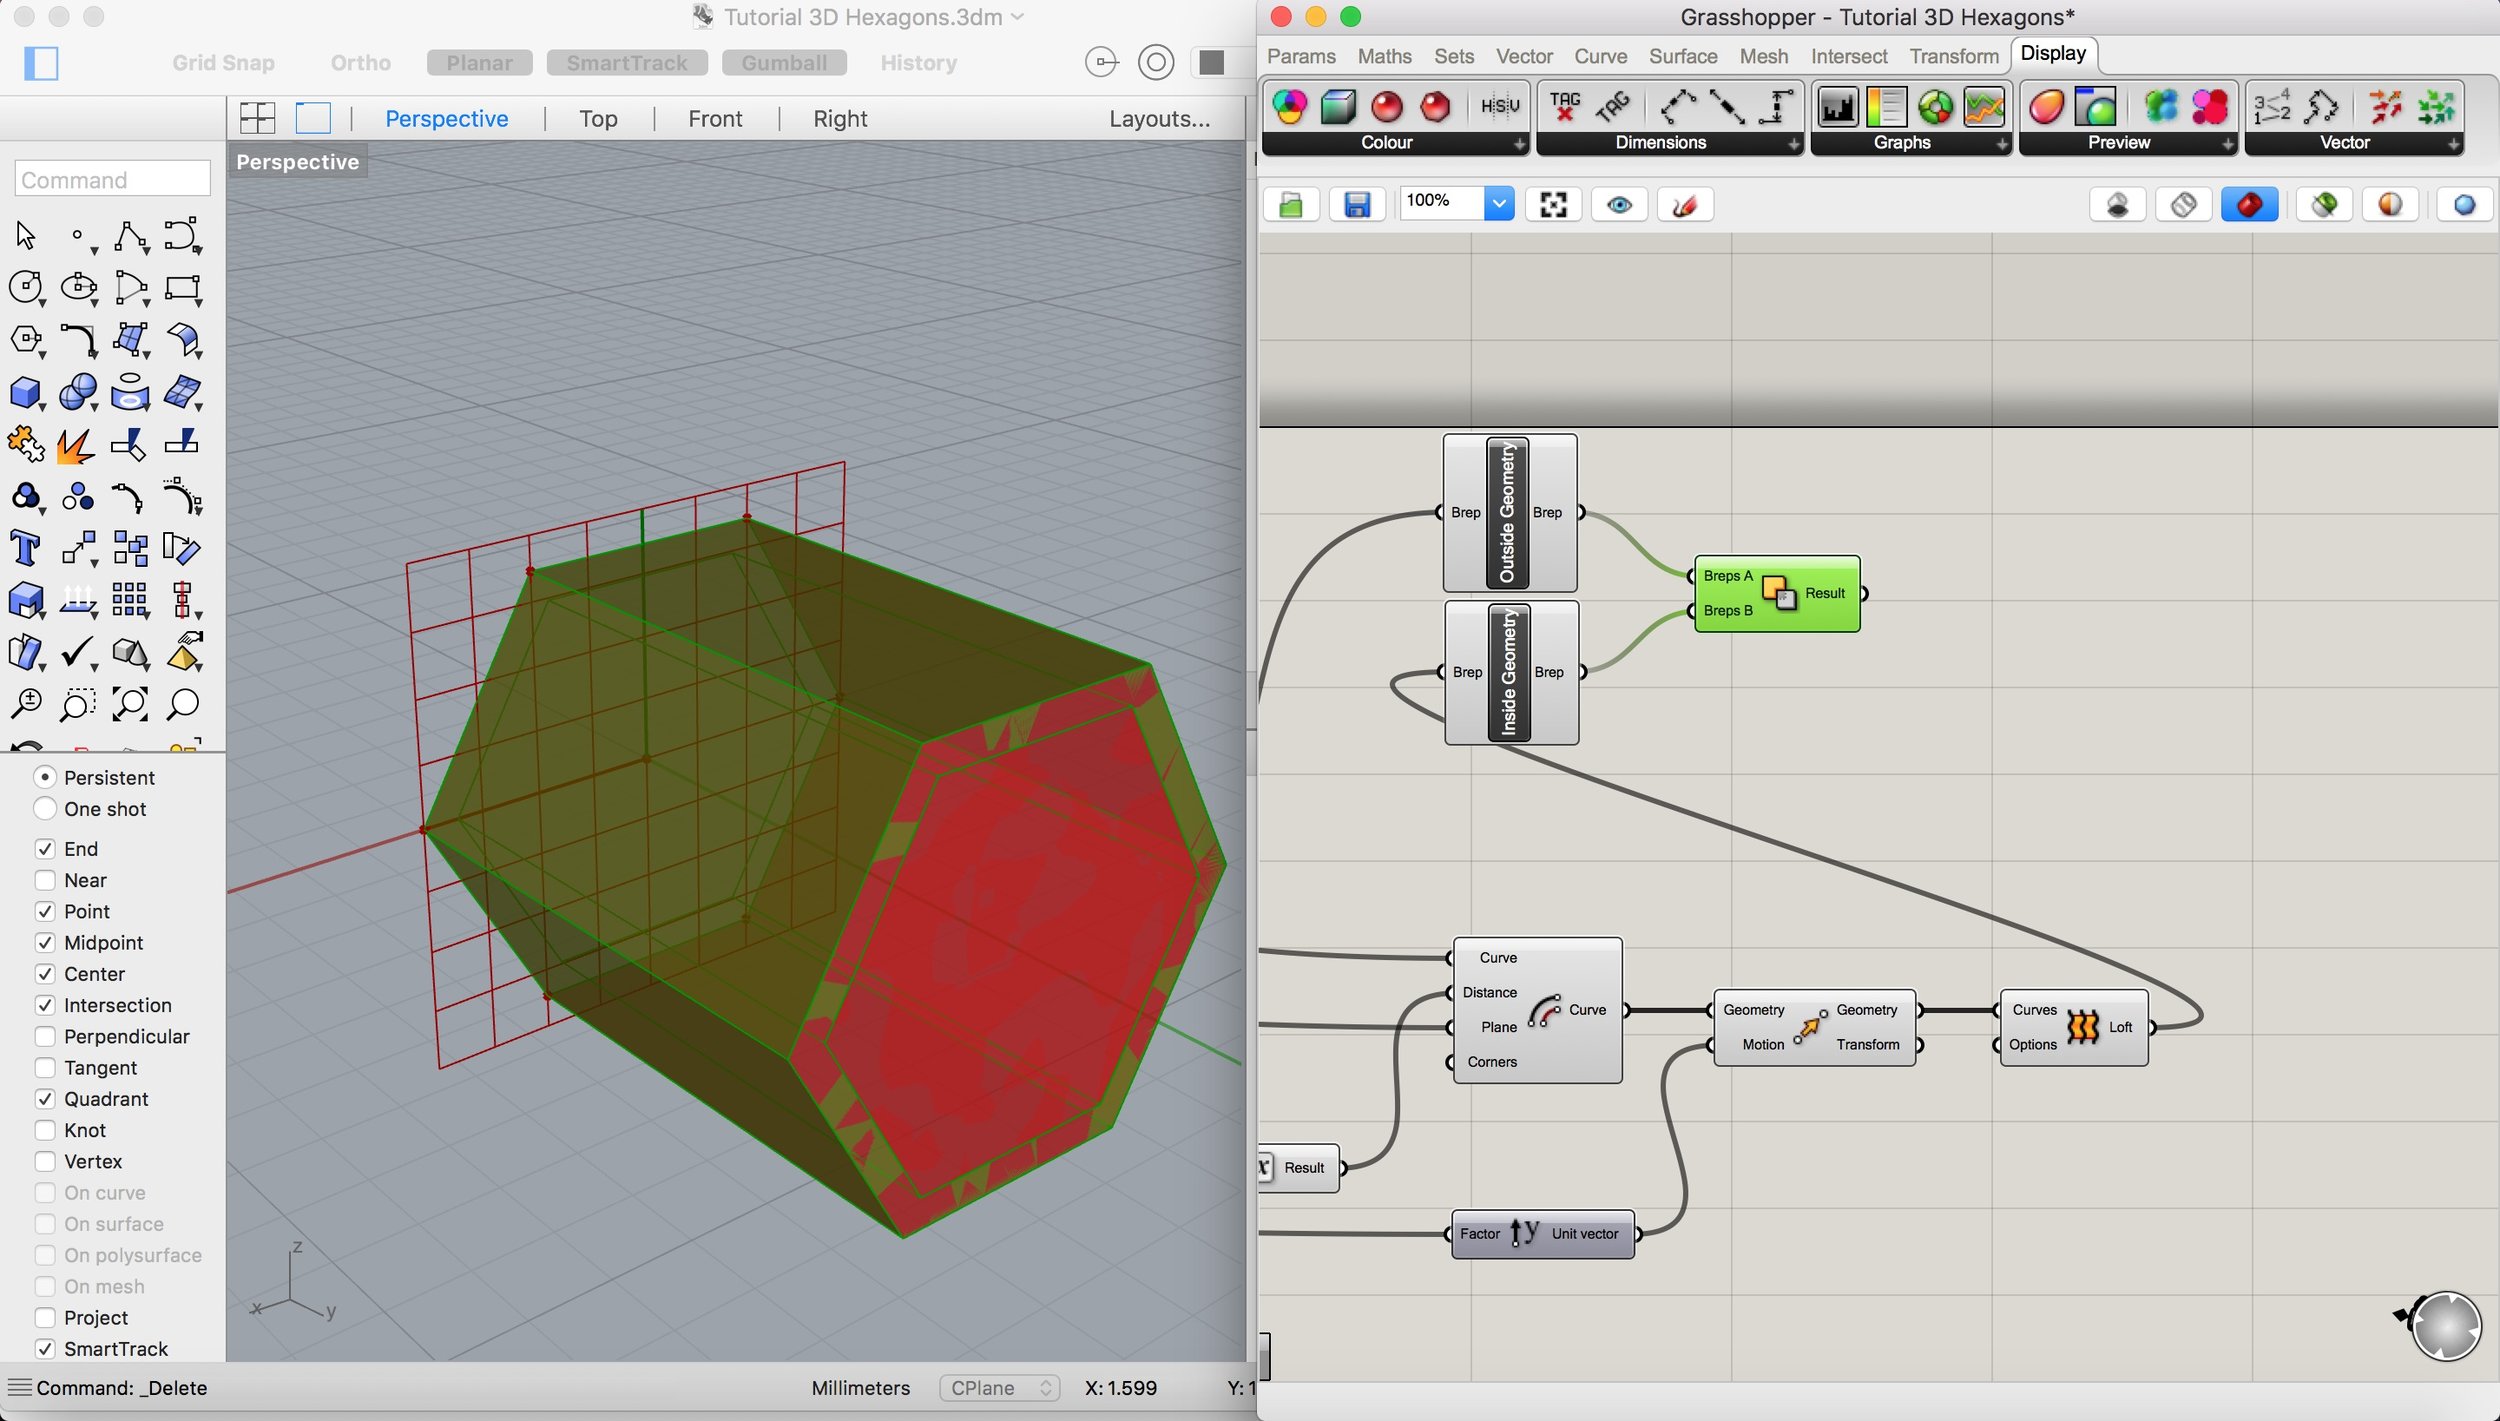
By selecting the Inside Geometry and Outside Geometry and pressing Shift > Disable Preview, the Inner Hexagonal Solid and the outer Hexagonal Solid become invisible, leaving the resulting shape.

I added a Params > Geometry > Geometry to the Solid Difference, and then Move, connected to the initial Vector > Grid > Hexagonal with which I made the Hexagon. This created a series of hexagons over a surface oriented on the XZ plane.
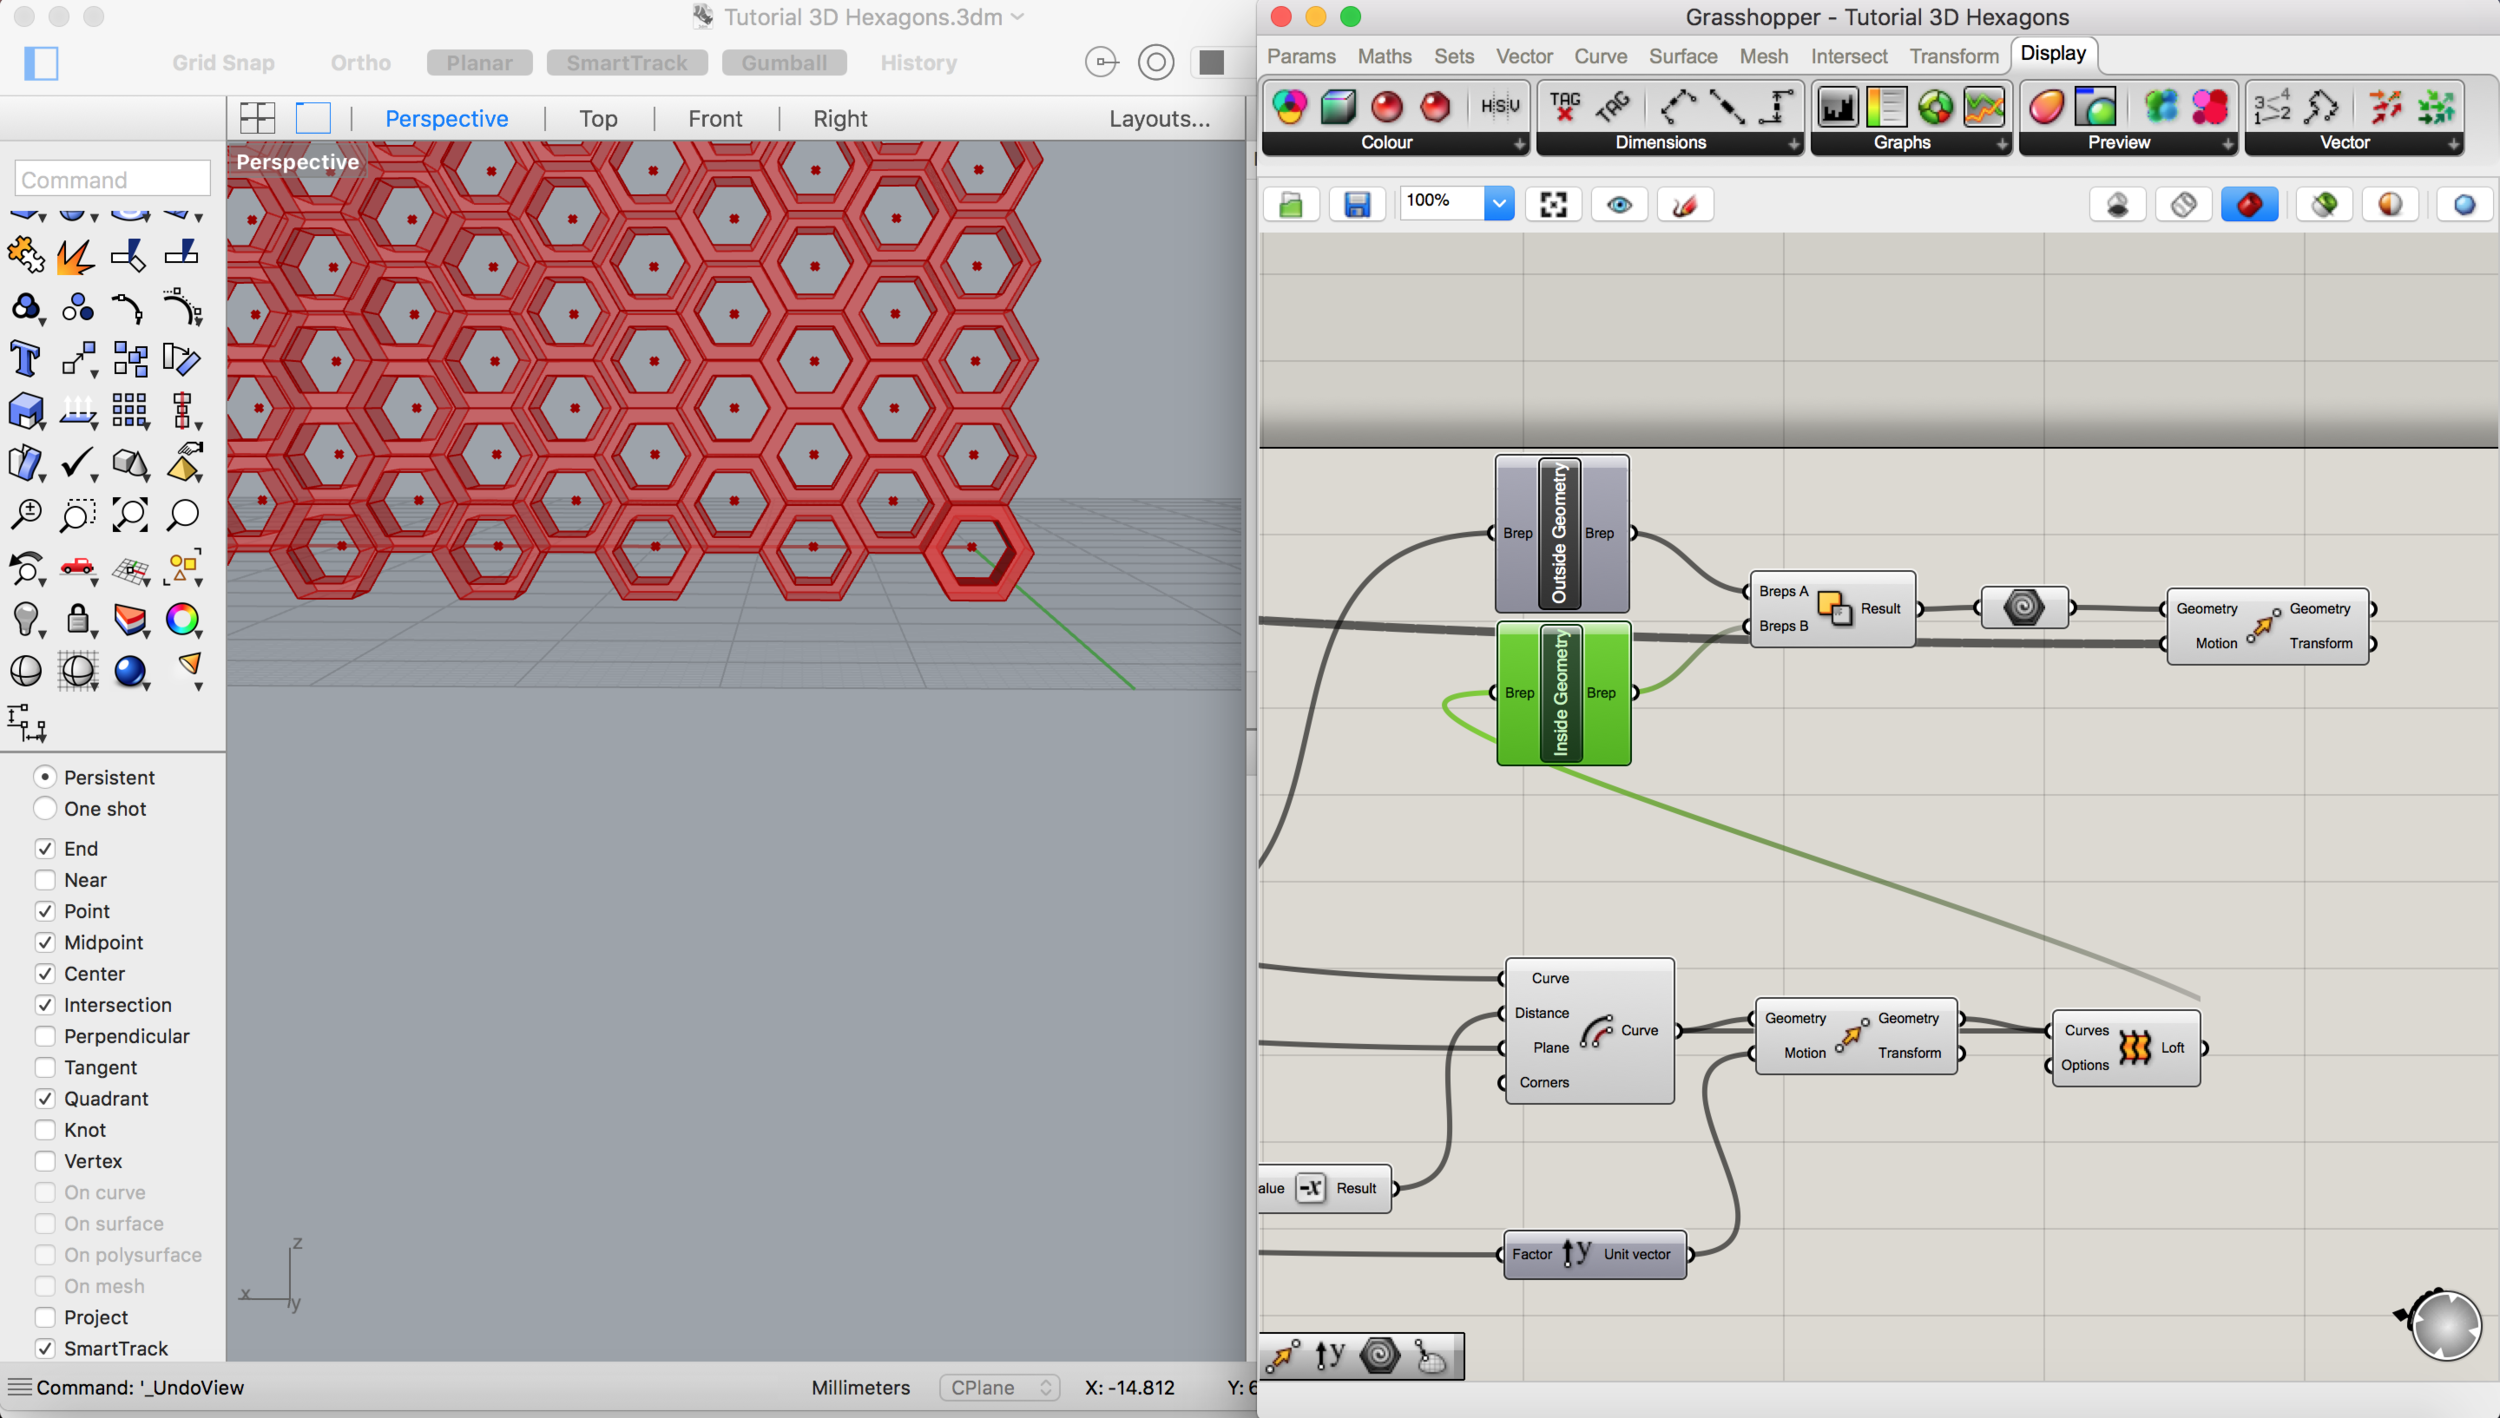
Once I tweaked the thickness of the hexagons using the Number Sliders at the beginning of my definition, I press Shift > Bake to bake my final mesh in Rhino and make it ready to export in .stl (stereolithography) format, so I can upload it on Repetier to 3D print.

HEXAGONS WITH NINJAFLEX
With the file I created doing the tutorial on creating a honeycomb structure, I made a small 3D print trial using Ninjaflex, to test the material for the first time.
3D print Recipe
INGREDIENTS
- .stl file of the honeycomb structure - created with Grasshopper
- black ninjaflex
- Proyectil 3D printer
PROCEDURE
1. Export the mesh created on Grasshopper and baked for Rhino to .stl format
2. Import the .stl file to the software Repetier and slice it to be 3D printed, using the settings for the Ninjaflex

I apologize for the quality of the images, but I was taking a photo of the computer as it was not mine and couldn't take a screenshot at the time..
3. Place the sliced file on an SD card and place inside the slot on the 3D printer a Proyectil FDM20. Get the file and tweak the settings like bed heat and nozzle heat.
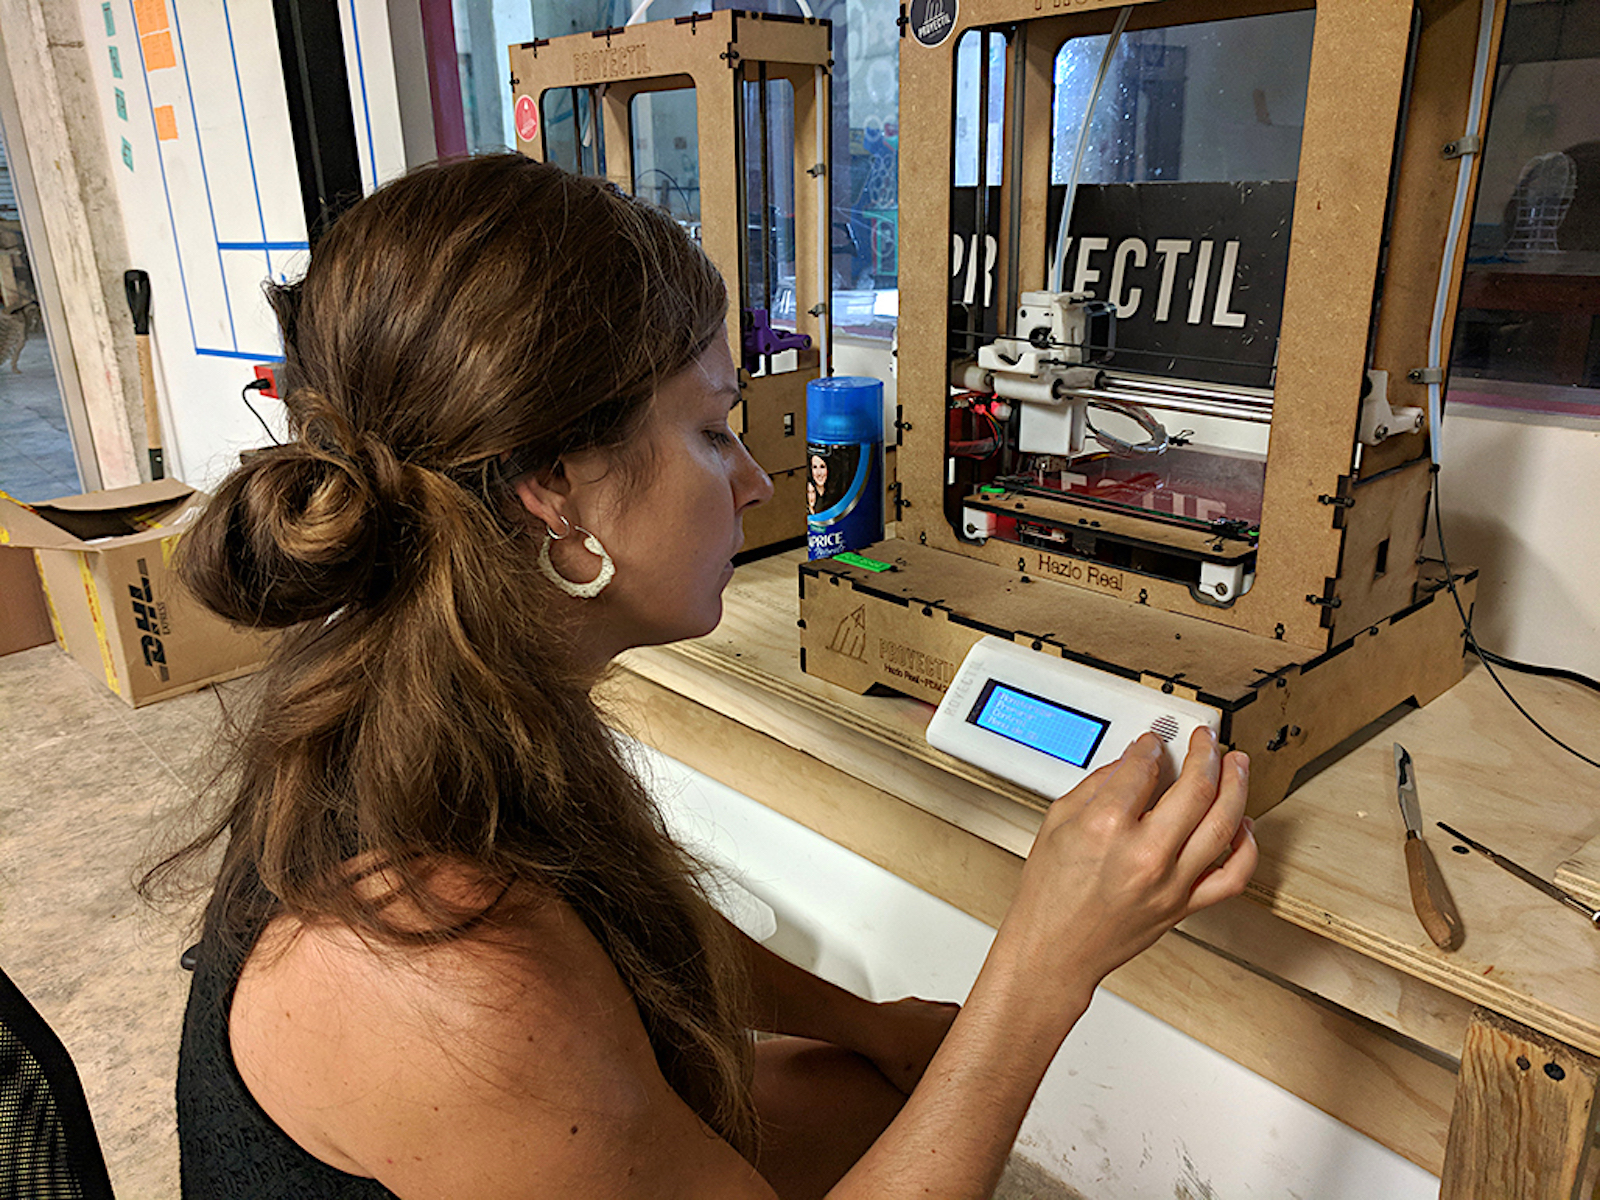
Add a thin layer of hair spray to the 3D printer's bed, to make sure the Ninjaflex will stick to the bed but also will come off with ease at the end. Ensure the bed is aligned on all four corners so the Ninjaflex can drop evenly on all sides.

4. Print the honeycomb structure with:
- 235 degrees C nozzle temperature
- 80 degress plate temperature
- Ninjaflex black filament


3D MODELING THE TOLOK SKIN
For the final project, I decided to model some kind of spikes resembing the tolok's skin. I was still deciding if to make the spikes/scales as triangles or hexagons, and then I found a tutorial that made it easier to make a series with hexagons.

Here is the tutorial I used to inform the design.
What I found interesting in this tutorial is the ability to make the height of the hexagonal pyramid-like scales variable, according to a curve.
First, I made a triangular pyramid

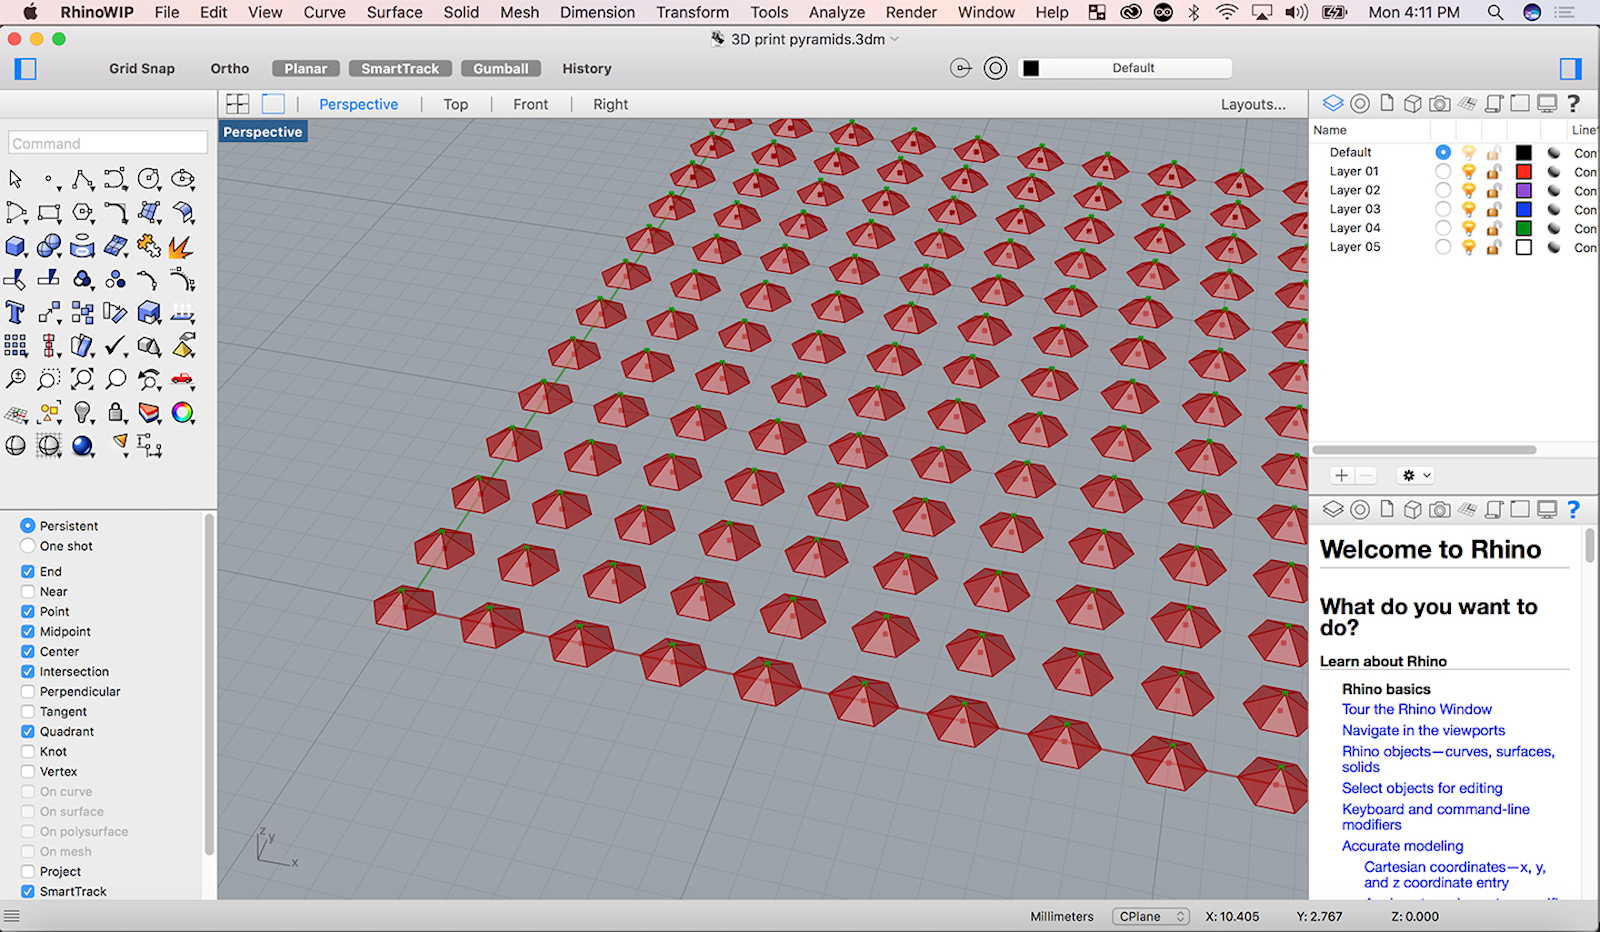


I tried to add an attractor point using the tutorial from Aldo, but I got stuck as it wasn't working properly so I gave up (only for now). I will try in the next iteration. I scaled the model to be 140 x 140 x 9 mm and exported it to .stl.
3D PRINTING THE TOLOK SKIN
Time to print again :)
MATERIAL
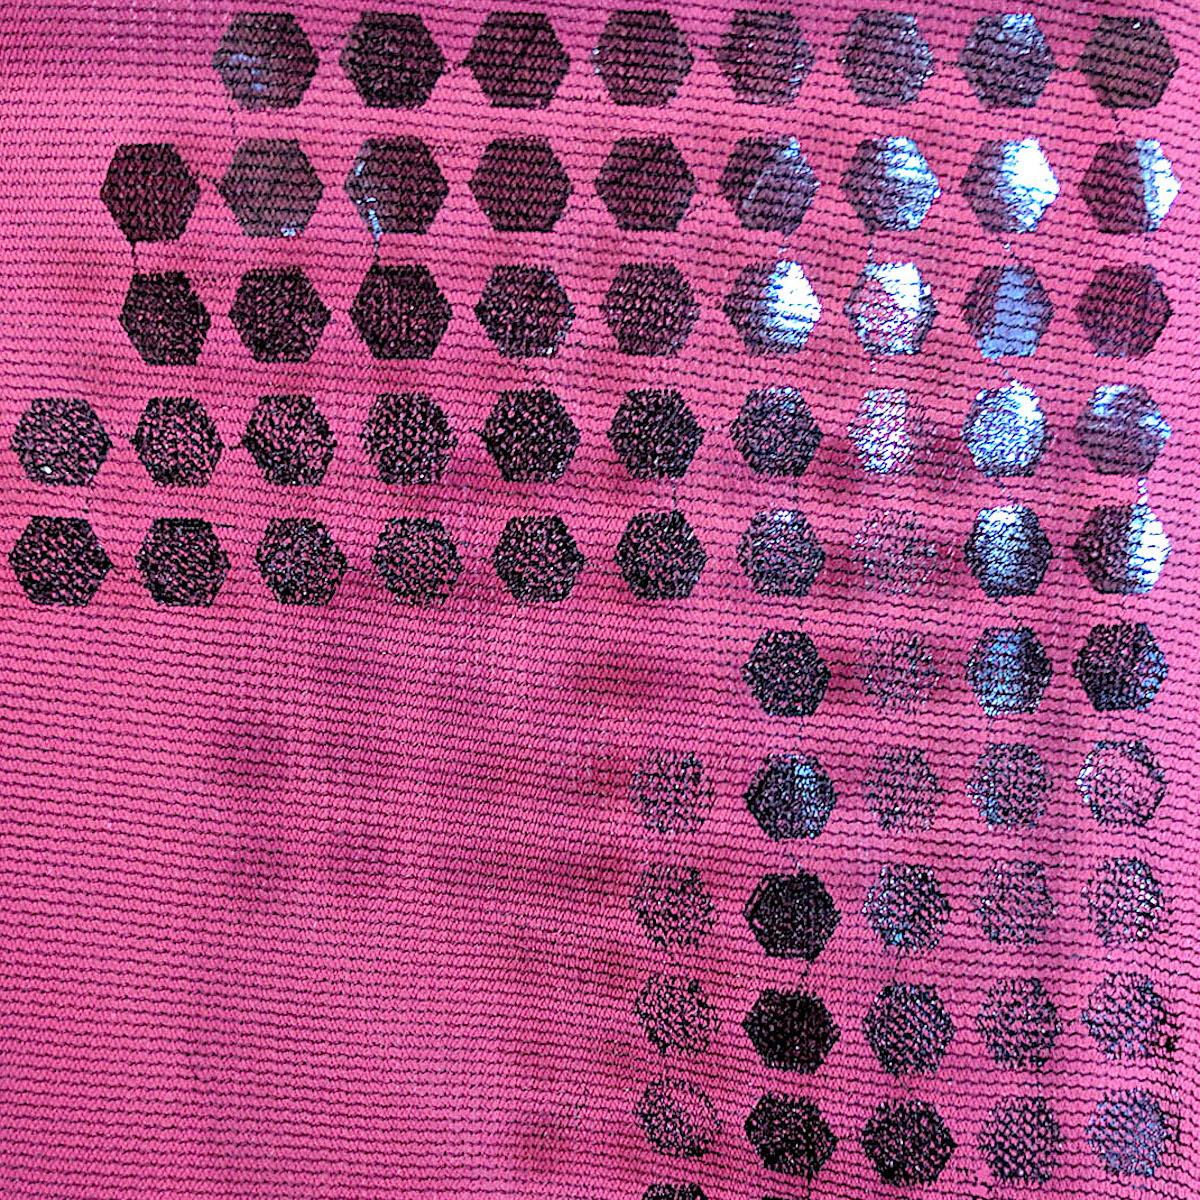
Black Ninjaflex on Black Organza
3D PRINTER
Proyectil
SLICER
Repetier
PRINT SETTINGS
- Extruder Temperature - 225℃
- Bed Temperature - 60-65
- Speed is variable - 25mm/s

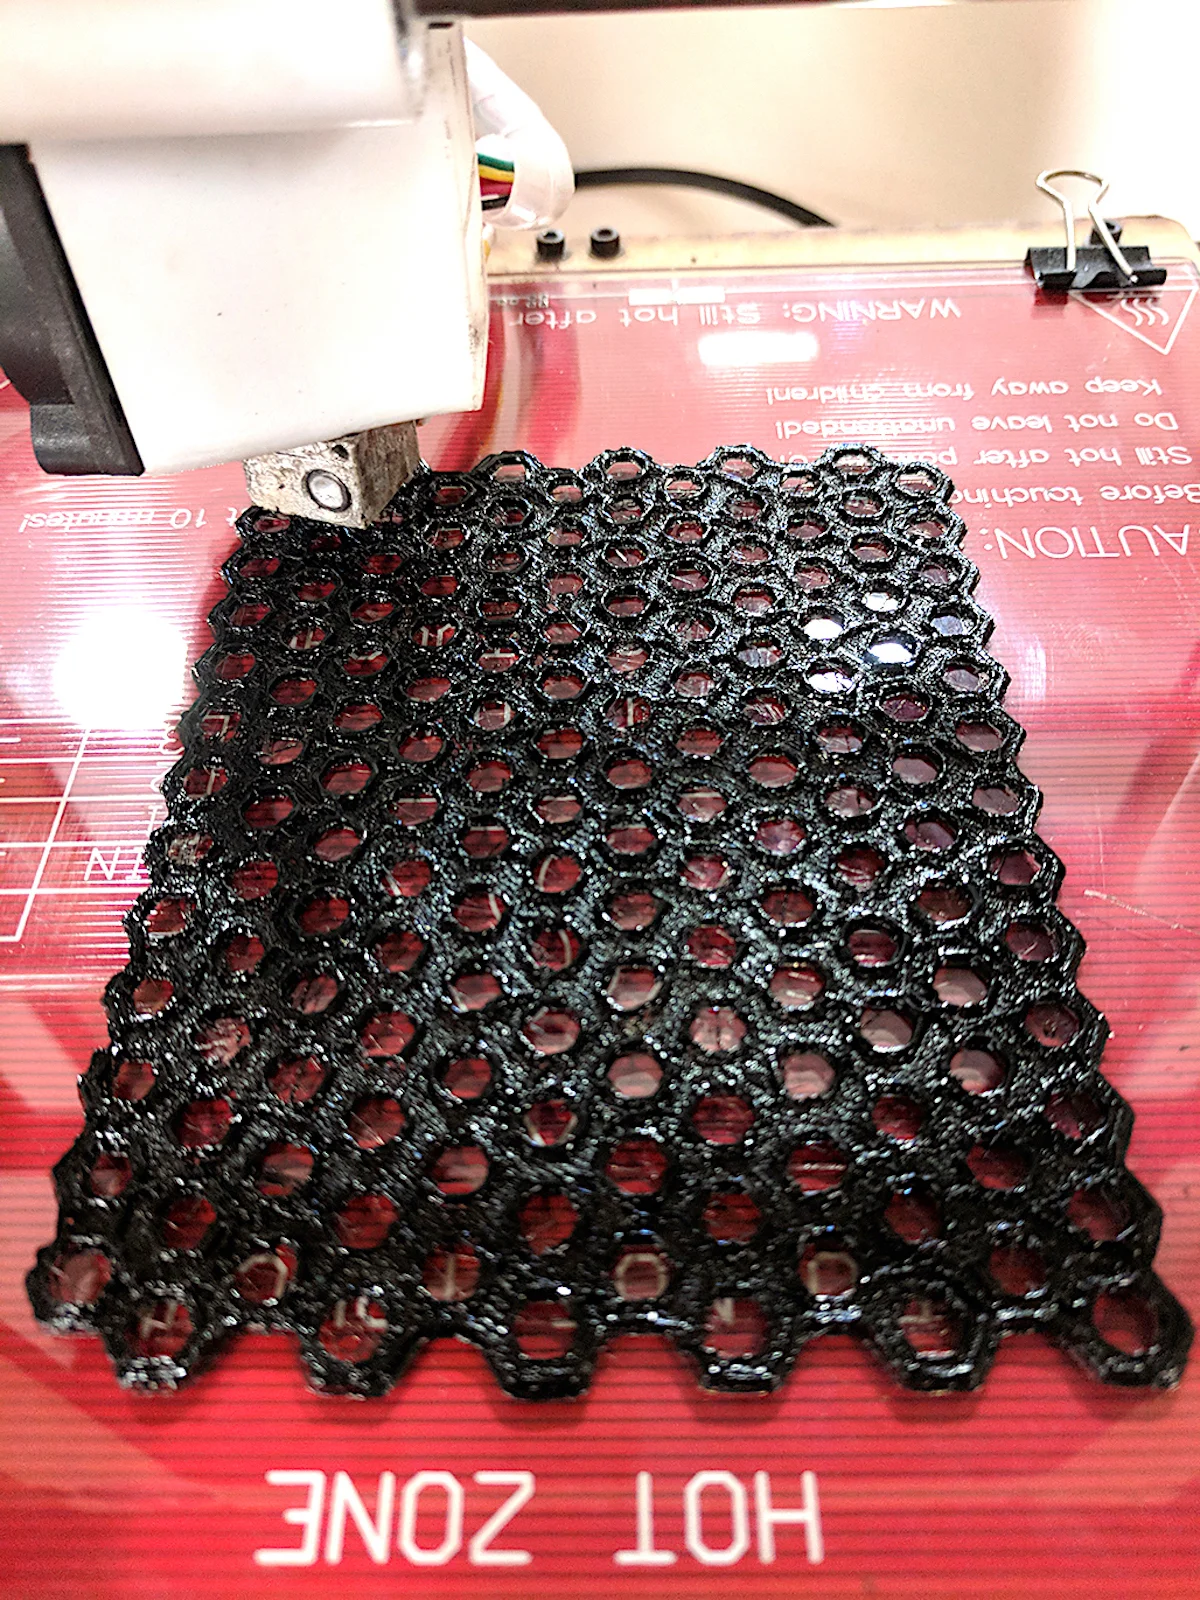
Sadly, after 10 min the 3D printer stopped working and we tried to fix it but there were some substantial issues with the nozzle, so we left it half way done.
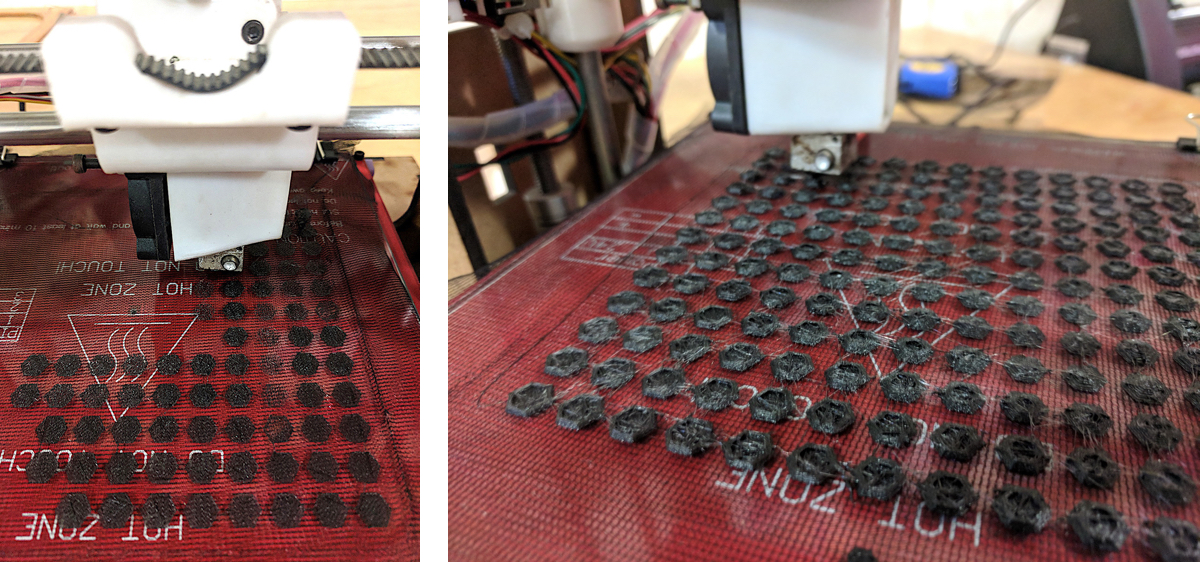
We tried a second iteration with the organza and the Nijnaflex hexagonal pyramids and it worked well. Total print time was 2 hours aproximately.
PUT VIDEO IN HERE
After the feedback session with Aldo and Anastasia, I realized that the work done, although it might not have been printed all the way through as I wished, was a good progress. Perfection doesn't exist but perfectionism does, and I am working on focusing on iterating rather than nto being happy with one result :)
So NOW.. The Proyectil FDM20 was fixed (nozzle was just majorly stuck) and we managed to print the whole file.

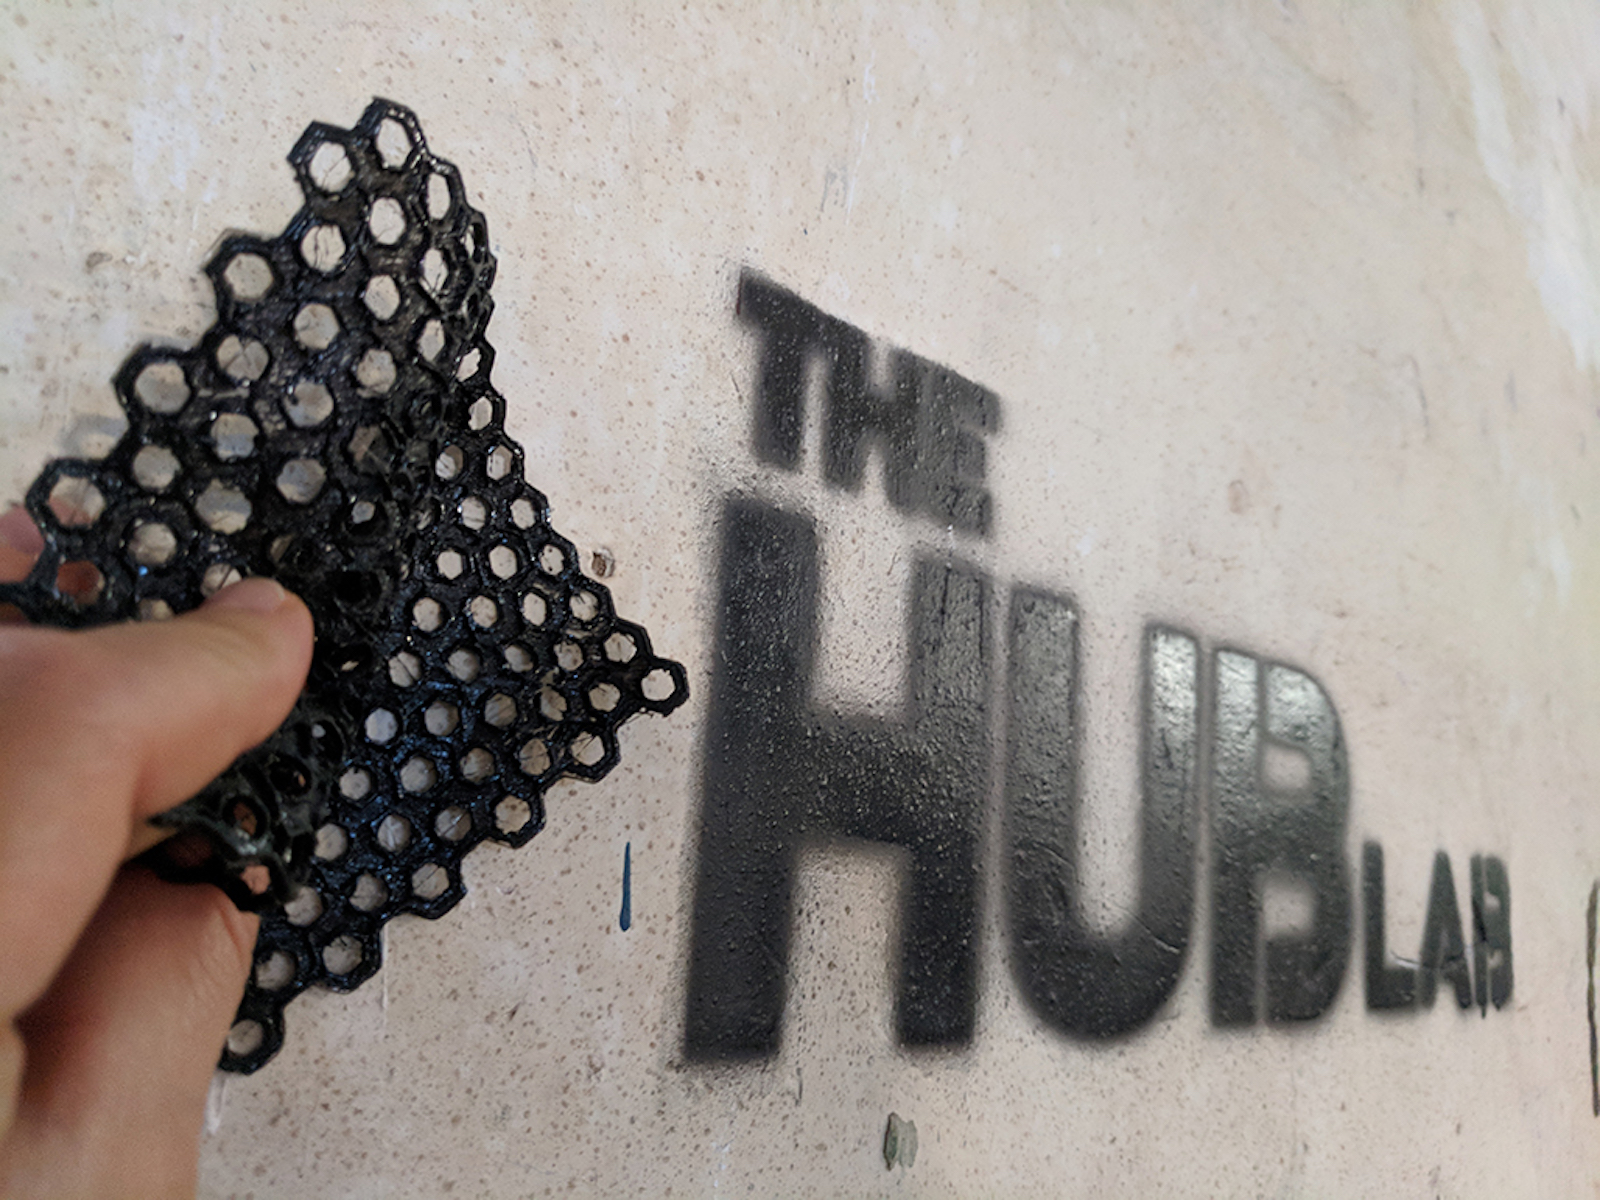
Here is the most elaborate of the 3 designs I made.
After seeing the final result my reflections are the following:
The difference in height is not too visible nor tangible, so I will play with larger variations
The texture is definitely too regular, so I will implement the attractor points to make the hexagons in different sizes
Given the wide spaces between the hexagons, it's quite irrelevant weather the material in Ninjaflex or not. Ony in case it was an application on a garment the softness might be a desirable effect rather than solid pointy spikes.
NEXT STEPS
- Closer hexagons to utilize Ninjaflex affordances at their best
- Attractor points to implement an irregular surface texture
- Greater height difference, just to make the tolok look more real ;)
Here you can find the Rhino + Grasshopper definition I made for the hexagonal pyramids.