
ASSIGNMENT
For this week's assignment, we focused on the fabrication of soft actuators, sensors and grippers using novel materials, artificial muscles and performative locomotion design. There were three levels of difficulty for the assignment completion:
- Level BASIC: Pneumatic wrist brace
- Level Intermediate: Soft Gripper
- Level Advanced : Pneumatic, digitally controlled system
I decided to go for the intermediate level, and to work on the gripper + another soft robot.
INSPIRATION
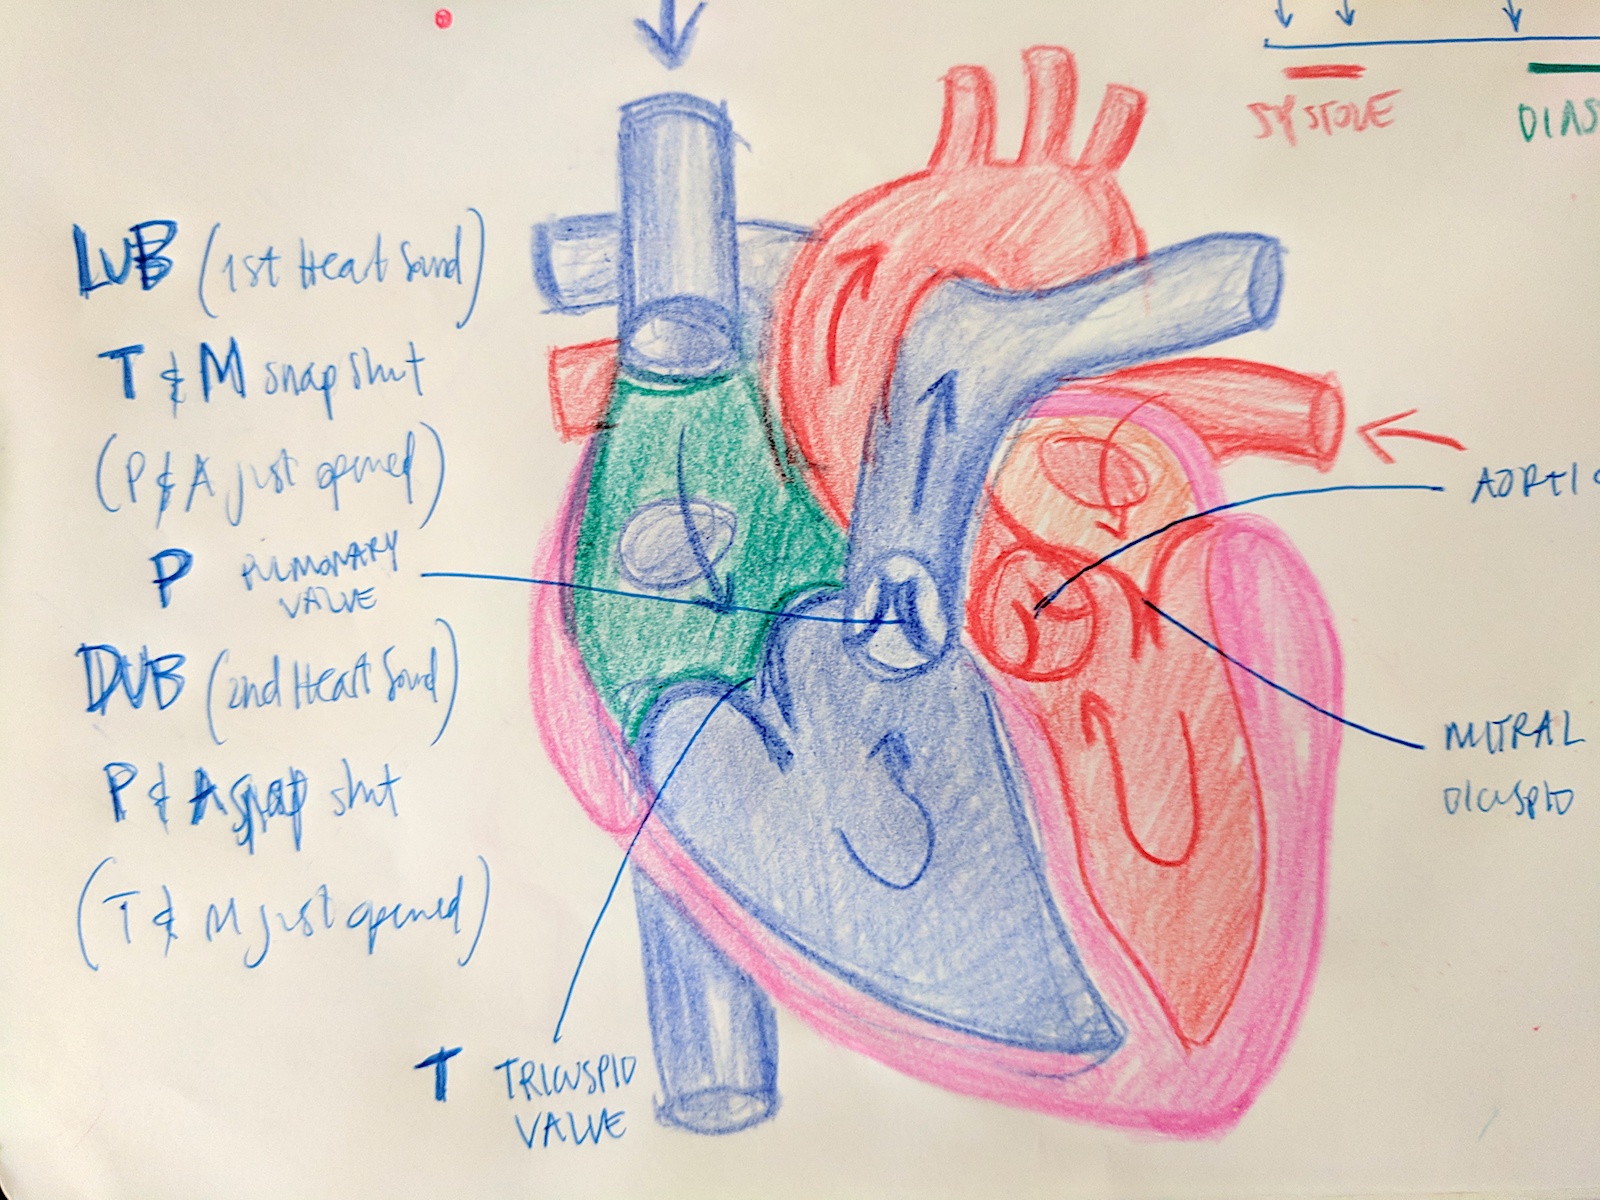
Because I have a mild obsession with the anatomical heart and how it works, I decided to make a soft inflatable heart for this assignment. In my ideal world, I would be able to make the heart inflate in a similar way the real heart does, so I have been studying the functioning of the anatomical heart in detail.I used this tutorial on Instructables as the starting point for my inflatable heart. It's for an Air-Powered Soft Robotic Gripper. In addition, I used the work of Paul Nichols from Fabacademy 2017 to make my work.
OBJECTIVES & PLAN
My objectives for this assignment are the following:
- Create a soft gripper to text how an existing design behaves as a soft robot
- 3D model a heart to be able to inflate it and mimic the heart behavior (or get close to it)
MAKING THE SOFT GRIPPER
In this initial stage I wanted to experiment with a existing soft robot mould, so I could get a feel for how the design impacts the behavior of the soft robot. Therefore I this tutorial on Instructables, which teaches us to make an Air Powered Soft robotics Gripper.
INGREDIENTS
- 3D printer - PUT NAME OF 3D PRINTER
- Metal Baking Tray
- Gummy Bears
- Ecoflex Silicone Rubber Mixture
- Plastic Straw
- Inflating Machine
PROCEDURE

First of all, I downloaded the .stl files from the tutorial and 3D printed them on the PUT NAME OF 3D PRINTER. This 3D printer has a very high definition and it would ensure the mould would have no holes. The whole print lasted about 8 hours.
After the mould was ready I decided to try to make the soft gripper with gummy bears. I used this tutorial from the Soft Robotic Toolkit to make it, fascinated by the fact of having a nice edible soft robot.
I purchased 2 kilos of gummy bears from a local candy store and came back to the Fablab to cook them. I separated the red gummy bears and placed them in a pot to melt, then turned the stove on and melted them. Once the gummy bears were melted i poured them in the 2 soft gripper moulds and let them cool down and get more solid for a whole night.
On the following day I tried to get the gummy bear robots out of the mould and found out a SAD truth: the gummy bear substance DID NOT WANT TO COME OUT FROM THE MOLD. THEY WERE COMPLETELY STUCK TO IT. I didn't fully expect this but there was really nothing I could do about it, so I had to scrape it away (nooo!) and clean the moulds so I could use them with the Ecoflex.
RESULTS & REFLECTIONS
- I made the mould and it looked perfectly made and followed the tutorial about the gummy bears.
- However, the sticky material from which the gummy bears are made made impossible for me to remove the gripper intact.
- Perhaps I needed to cover the mould with some kind of greasy substance, such as oil. or butter, to make the gummies stick less to the mould. I'll try it next time!

After the gummy bear experiment i decided to go for the Silicone, but before that I wanted to 3D model and 3D print the heart so I could make the 2 soft robots at the same time.
MODELING THE INFLATABLE HEART
INGREDIENTS
- Youtube
- Pen and Pencils
- Rhino
PROCEDURE
I went through a few iterations to get the heart mould created. Initially I thought to make an approximate version of the heart, and I started building the inner cavities in a way that loosely resembled its internal functioning (top left picture). I put the air entry at the centre like the soft gripper and thought that would work great for me.
After talking with Adriana from Fablab Kamp Lintfort, I decided instead to make my mould more precisely representative of the functioning of the heart. I also wanted to work on the optimization of the shape to save material and make my air chambers more effective. So I watched a ton of different videos on how the heart works and understood the mechanic and hydraulics of the cardiac pumping system. My knowledge is synthesized in the drawing at the top of this post, and on the top right picture below, this is how I worked to create my 3D model in Rhino.
One of my key aha moments in my study of the heart diastolic and systolic blood pressure, is that the Aorta and the Pulmonary Artery overlap amore or less in correspondence with the semilunar valve, at the center of the heart. If I wanted to make my heart realistic, I would have to make two moulds and overlap them, by showing the movement of the blood between the two chambers.
To begin, I decided to make on half of the heart and evaluate if it worked.
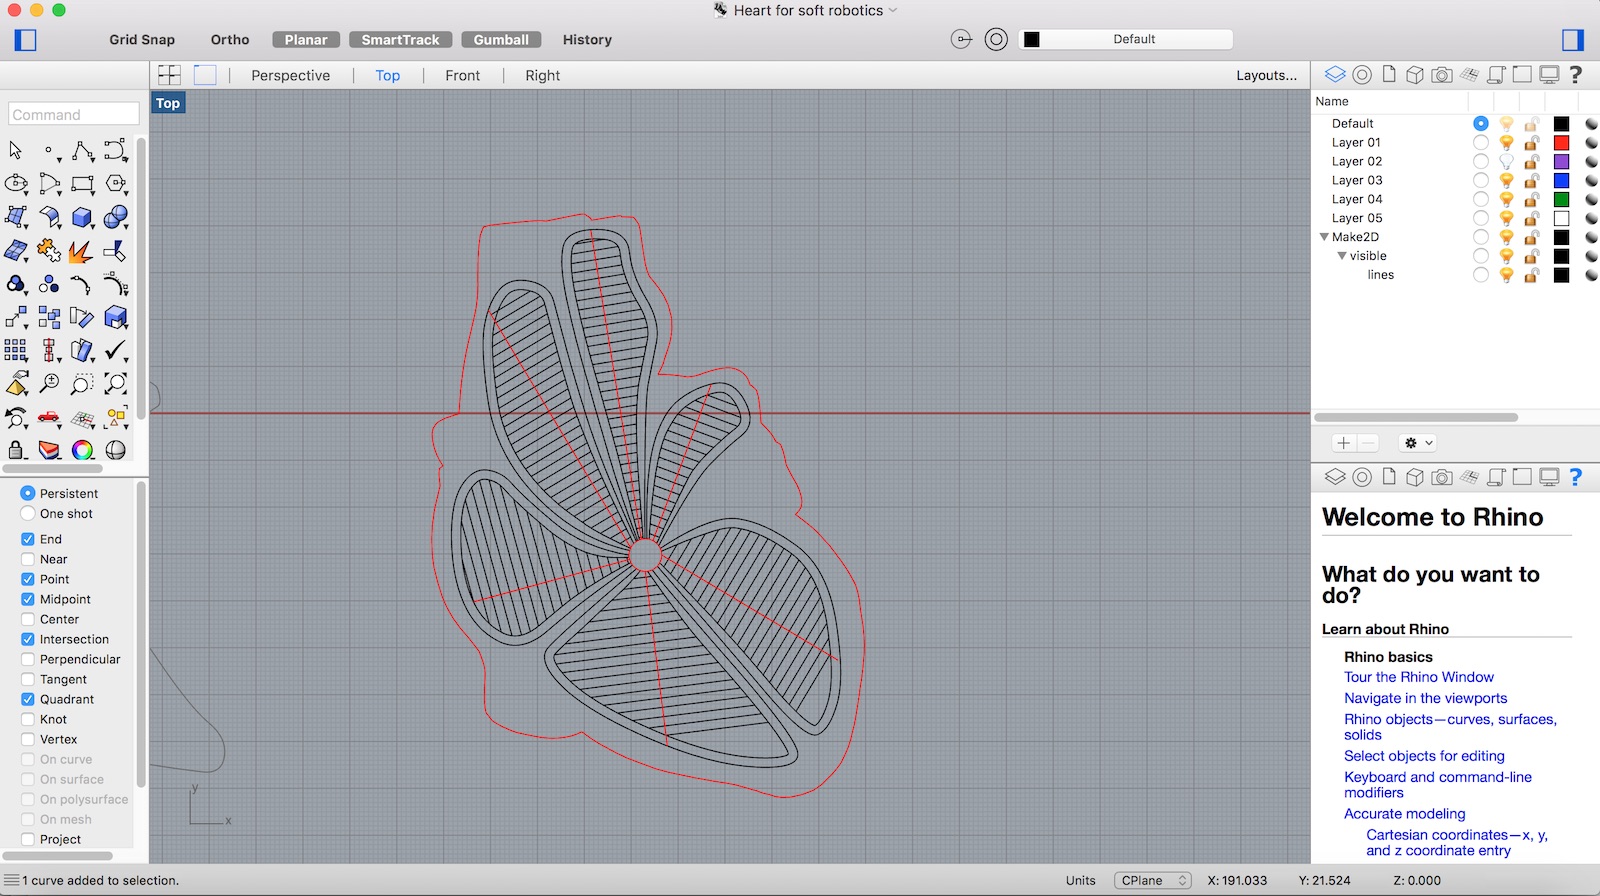
In Rhino, I put a photo of my heart sketch as background using the command View > Background Bitmap > Place. I then started tracing the outline of the heart using the command Control Point Curve, adjusting it by using the command PointsOn and moving them with my mouse.
I then created the inner "spine" of the mould, the main channel where the air would flow through ( see lower left picture). I also made the transversal channels for the air to fill them up as well. First I created a curve with Control Point Curve, then I adjusted it with PointsOn. Once it was ready I used the command Offset to make another identical line parallel to it and closed the lines with Polyline to make a closed curve. I extruded the curve with Surface > Extrude Curve > Straight, and then made it into a solid with Solid > Cap Planar Holes.
For the transversal parts I made a Rectangle with specific values to make it long and thin. I used the command Array along Curve to put all the boxes I needed at the same distance one from the other. Then I scaled each rectangle to make it fit the area of the heart's right ventricle using the command Scale 1D. I extruded the rectangles in the same way with Surface > Extrude Curve > Straight, and then made them into solid with Solid > Cap Planar Holes.
I made a Surface out of the closed curve of the right ventricle using Surface from Planar holes and then made it into a solid 3 mm thick with Surface > Extrude Curve > Straight, and then made it into a solid with Solid > Cap Planar Holes. To make the walls of the mould I used the same curve of the right ventricle and extruded it, then used the command Offset with 3mm thickness and got solid walls.
Now the half hear was ready to be exported, through Export > Export Selection and choosing .stl (Stereolithography) for the 3D print. DONE!
RESULTS & REFLECTIONS
- Making the half heart was a very very fun experience and extremely enlightening to learn about the complex yet elegant mechanism regulating our internal motor, the HEART.
- I feel I would still improve the shape and make better simulations of the atrioventricular and semilunar valve. I made one transversal line longer, touching the walls, thinking it would create the effect, but I think I should have done the opposite to make the hole for the air smaller. Oh well..
- I hope to be able to make the other half and play with this further. It would be a great tool for learning :)


3D PRINTING THE HEART MOULD

INGREDIENTS
- Repetier Software
- Rostock Max 3D printer
- PLA
PROCEDURE
We put the .stl file in Repetier and gave it the following settings:
Once the file was ready for the print, we uploaded it on an SD card and placed it on the Rostock Max 3D printer.
We used PLA in lilac color, because...
The print took about 12 hours to finalize and on the left you can see the final result. As with the soft gripper, we decided to make the 3D model at a very high definition to avoid any hole in it.
RESULTS & REFLECTIONS
- The process was smooth and the Rostock Max 3D printer proved to be an excellent 3D printer to achieve a high quality work.
- As usual with 3D printing, the higher the definition of the print the longer it takes, so don't expect it to be a quick job! Leave it printing at night!
MAKING THE SILICONE ROBOTS
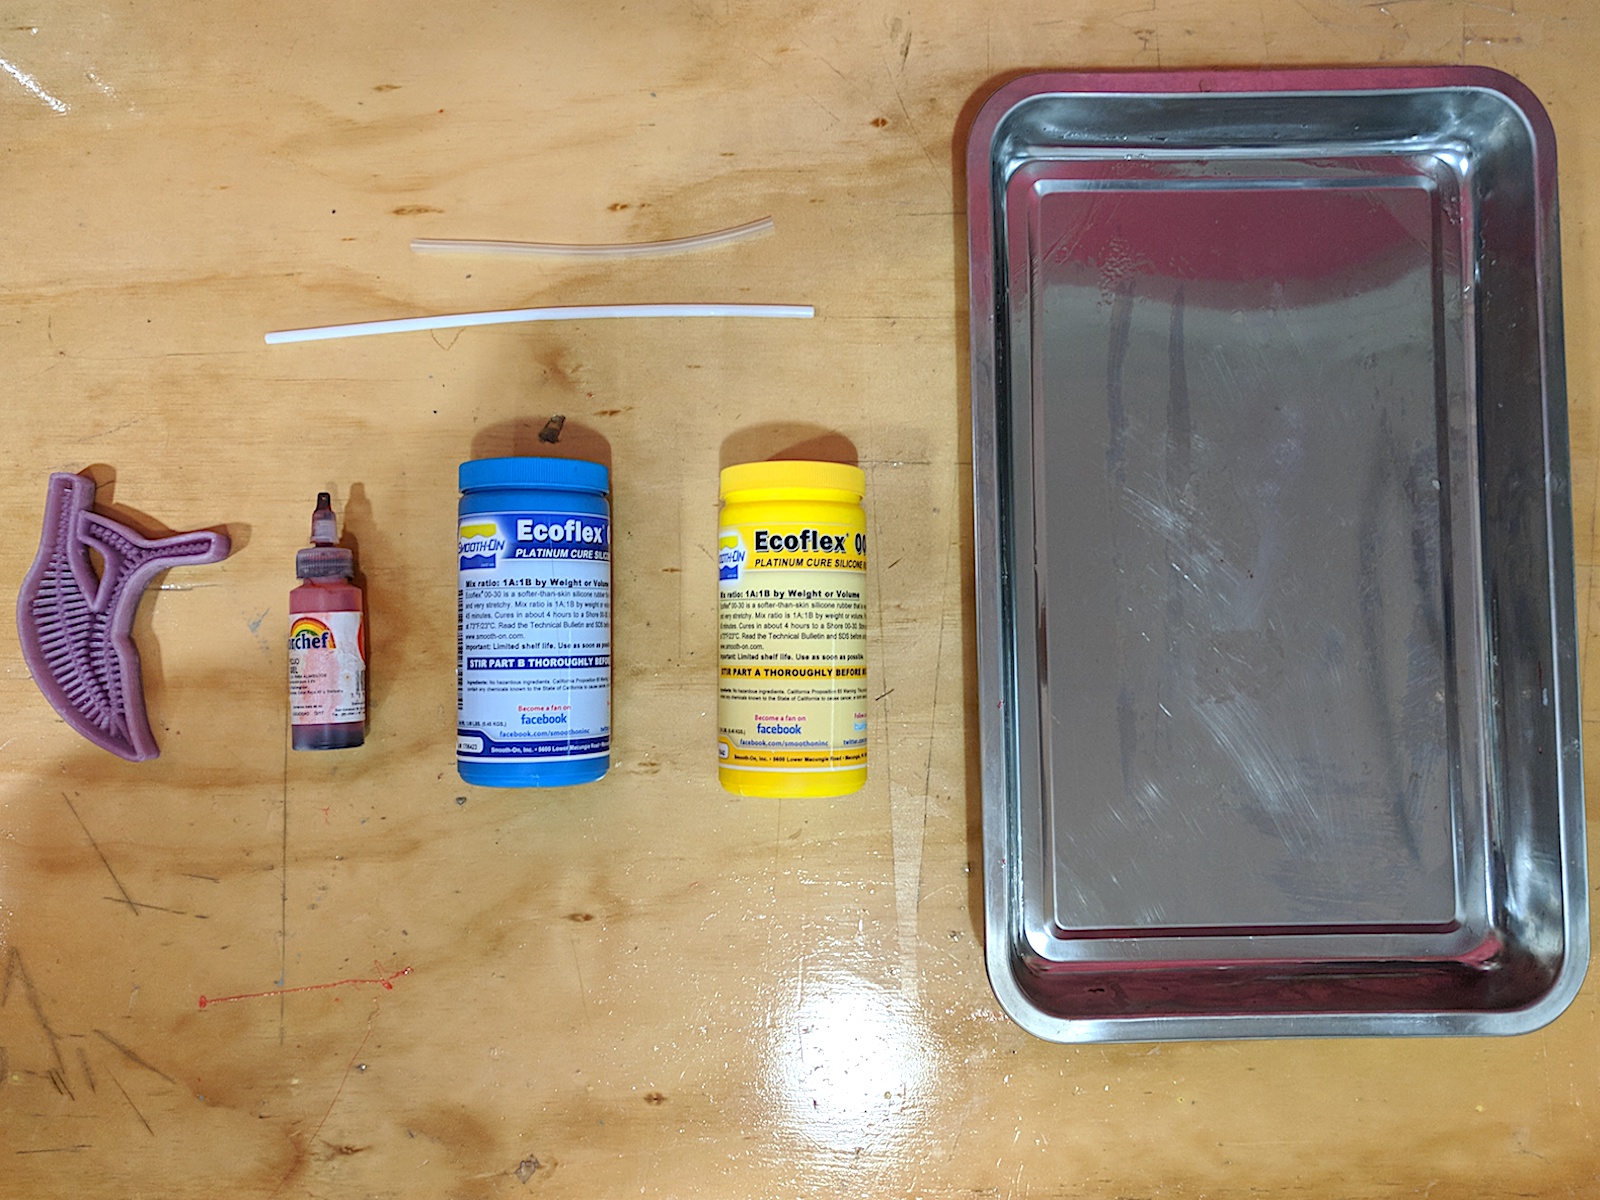
INGREDIENTS
Ecoflex 00-30 Part A and Part B
- Measuring Cup
- Stirring rod
- Red food coloring
- 3D printer Moulds
- Metal tray
PROCEDURE
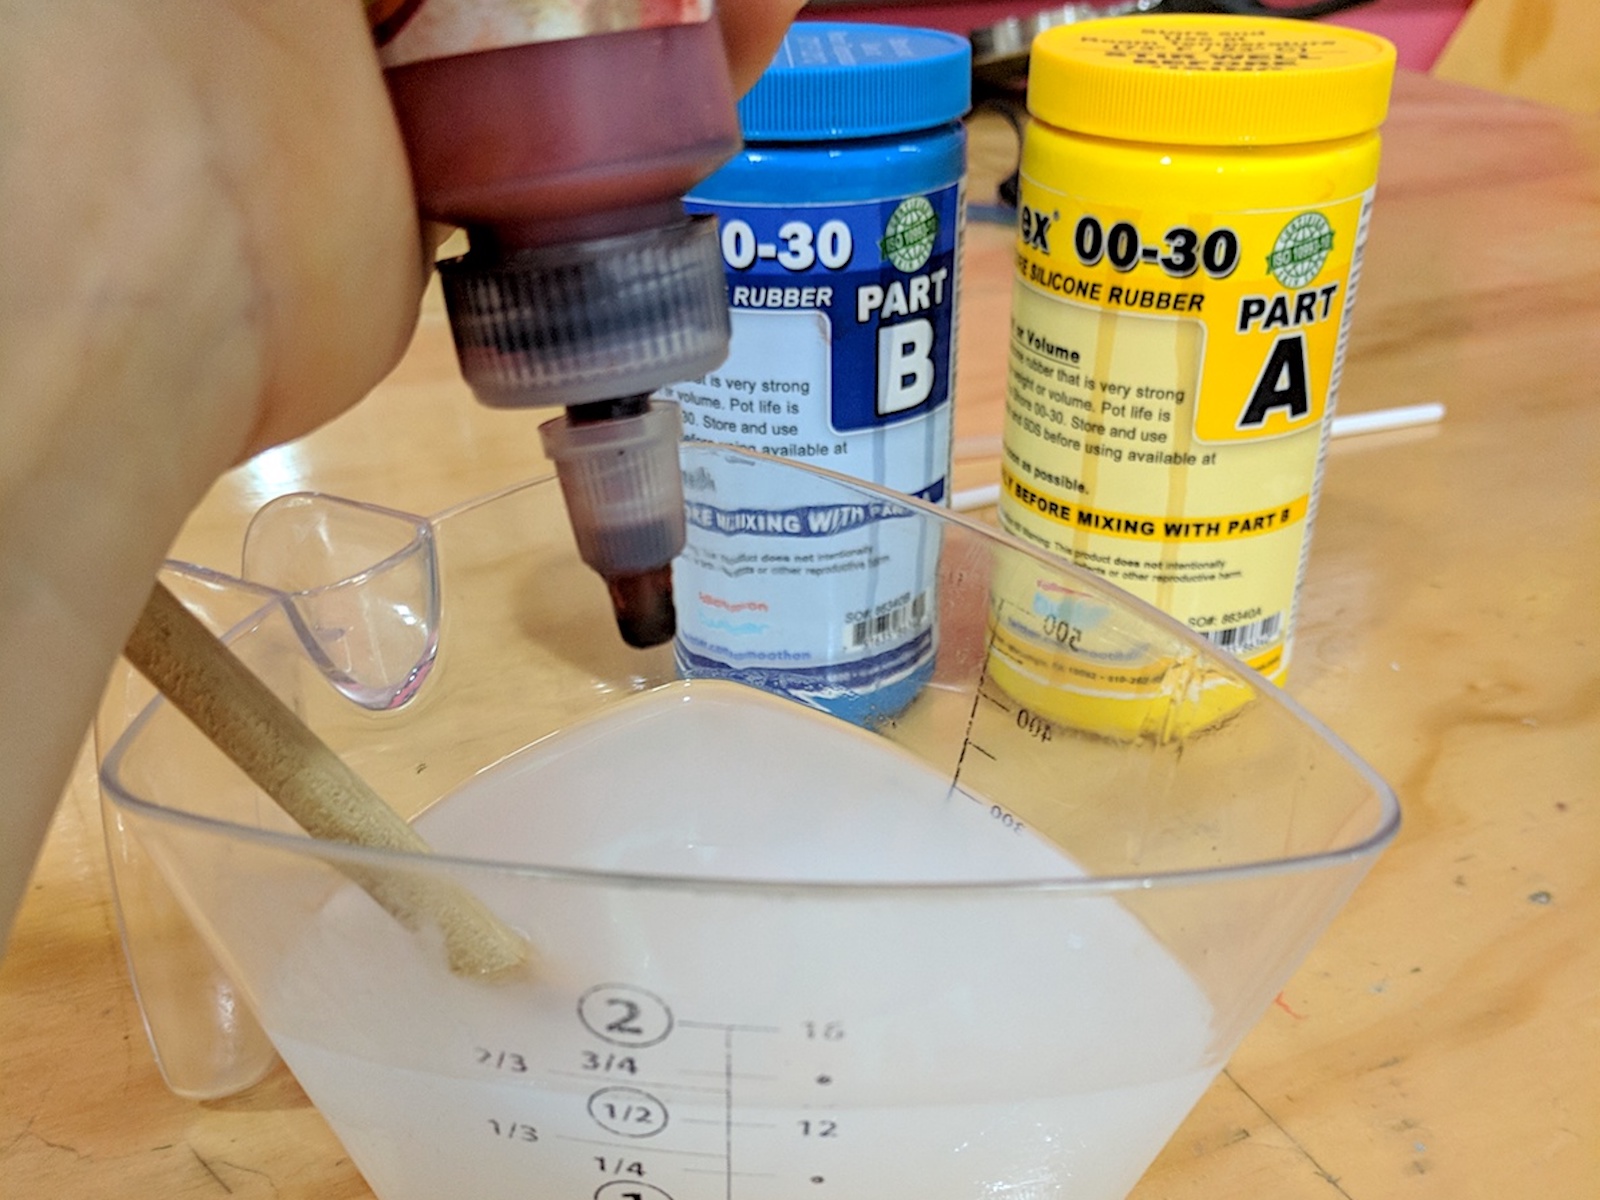
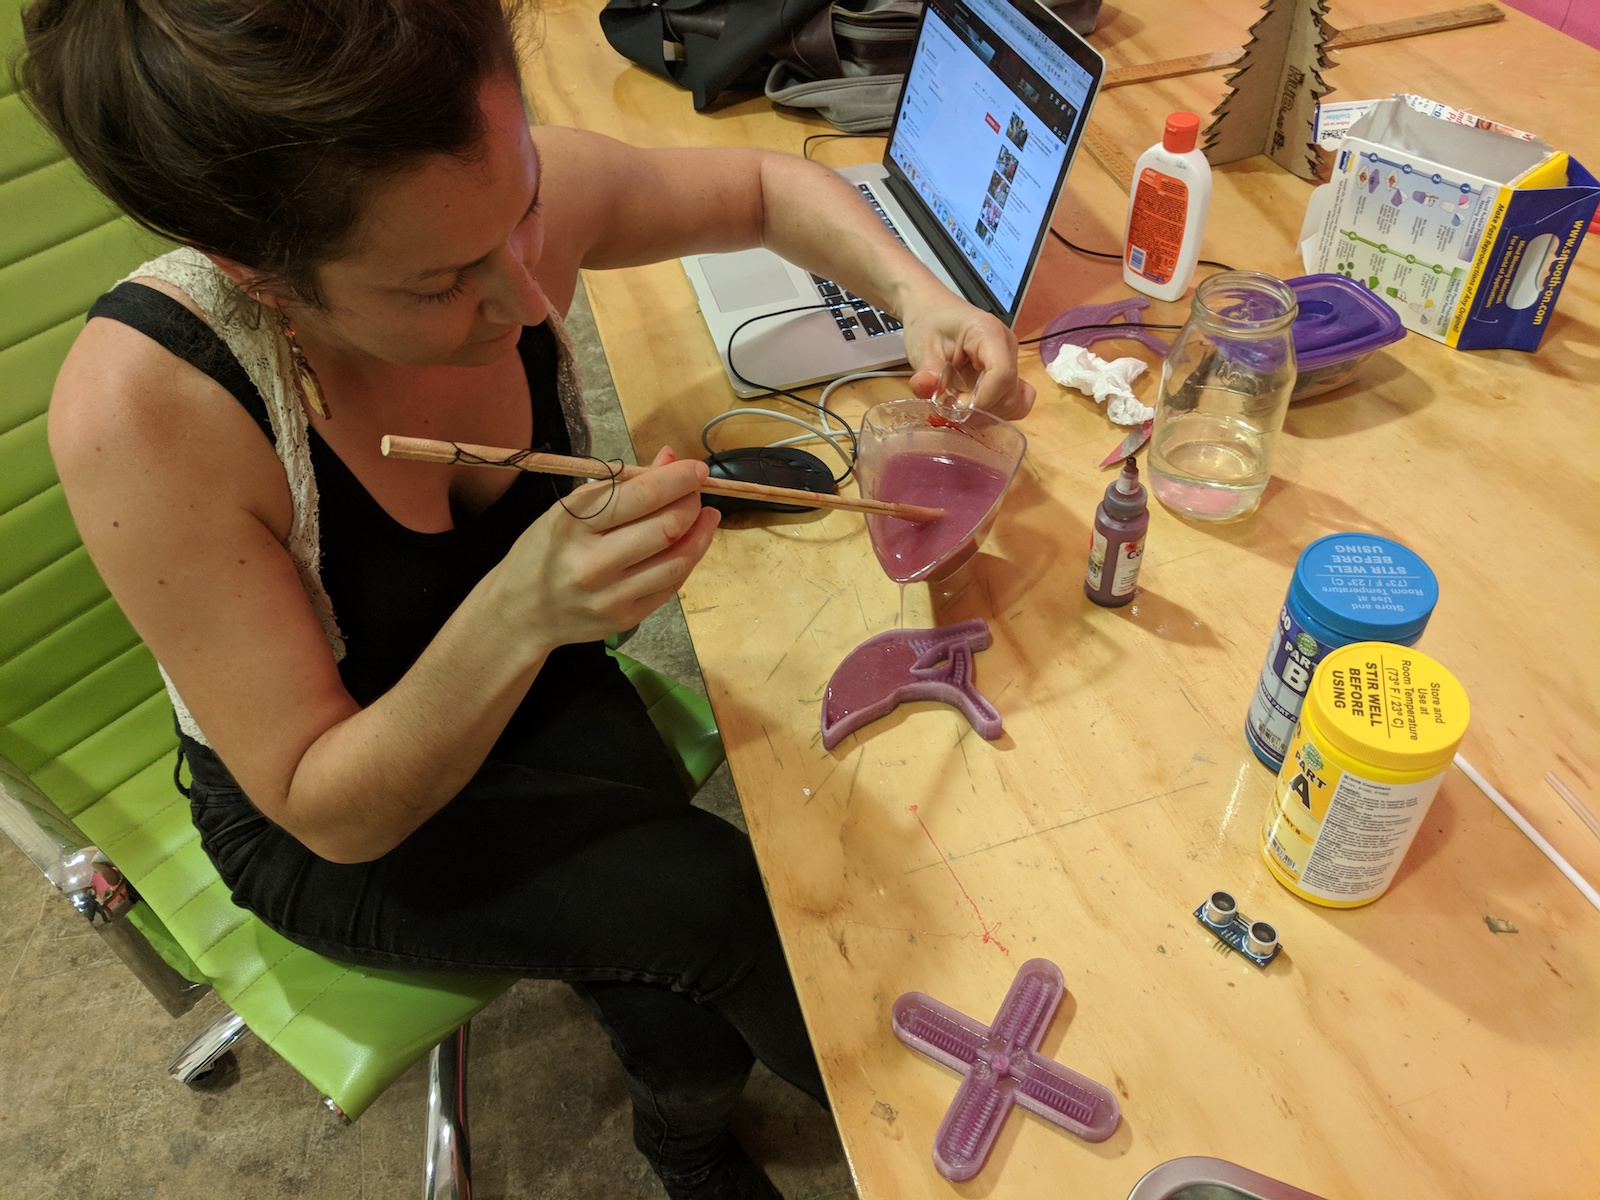
I poured half of the Part A and half of the Part B Ecoflex in the measuring cup and stirred them together with the stirring rod for about 2 minutes. I also added some red food coloring to make a nice effect, more resembling the heart.
Once the mix was smooth and uniform, I poured it in both the gripper and the heart mould, filling them to the top. I poured the remaining Ecoflex in the metal tray, making sure it was a surface as uniform as possible.


We then removed the air bubbles from both moulds by putting them inside the vacuum machine. A lot of bubbles surfaced from both moulds, and that process would ensure that no bubble would remain stuck, making the robots weaker.


Once the moulds were ready, I left the Ecoflex to cure for 1 night. On the following day it was fully cured and with a nice sticky flexible texture.
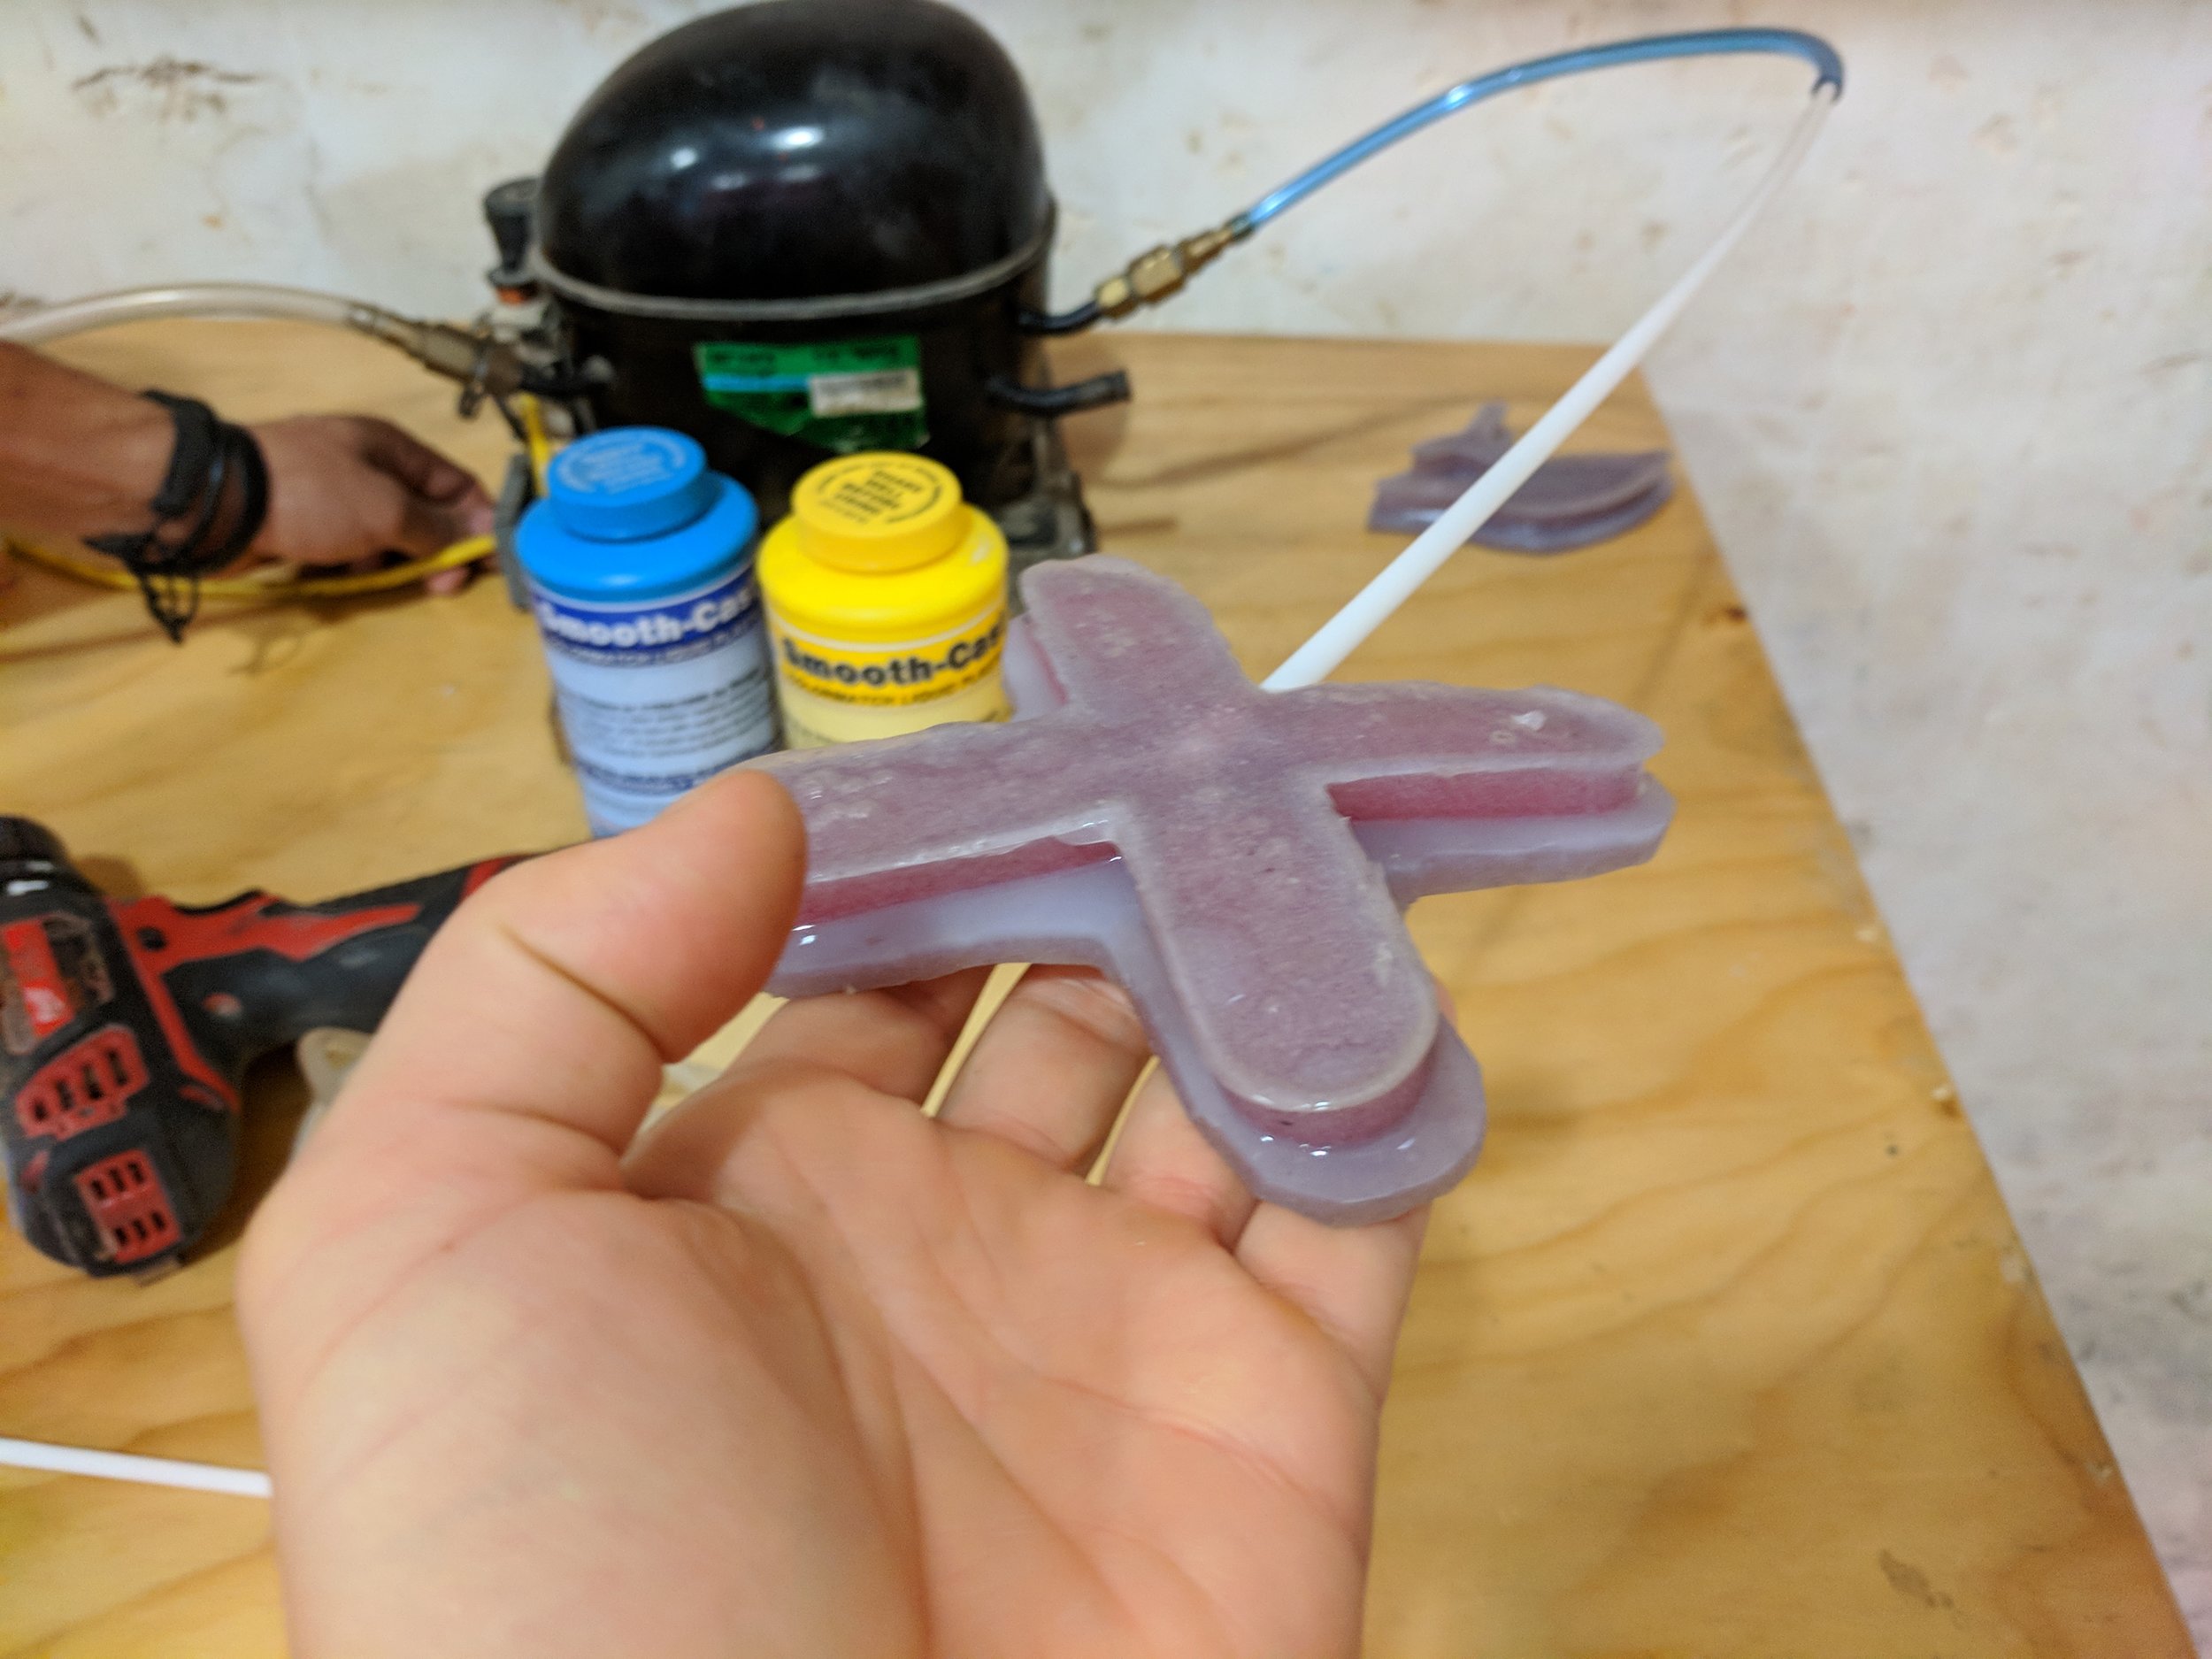
At this point I prepared a bit more Ecoflex mix so I could use at glue to attach the pieces coming out of the mould and the Ecoflex in the tray. I removed the Ecoflex from the moulds and it was an easy process (unlike the gummy bears..). I flipped the molds with the channel parts and placed them facing the Ecoflex on the tray.
With the Ecoflex I just mixed, I sealed the junction between the top and the bottom, ensuring no open hole was left. I left the Ecoflex to cure another night and then it was READY!
I removed the moulds from the tray and with scissors I cut around the edges to get them independent one from the other. It's great to squeeze them!

Here is the dynamic graph which is visualized on Processing. It's my heart!
RESULTS & REFLECTIONS
- This part of the process was fun. I'm always delighted to get my hands dirty with a new material and it was my first time with Ecoflex.
- I would love to experiment more with this material, by adding different colors and maybe little fragments of things to make it look cool. But pieces would make the material weaker potentially, so I would have to pay attention.
INFLATING THE SOFT ROBOTS
INGREDIENTS
- Motor
- Straw
- Soft Robots
PROCEDURE
With the plastic straw I had, I pierced a hole at the center of the gripper, like the tutorial suggests. I then tried to inflate it by blowing air in the mould through the straw. Nothing much happened.. The Ecoflex walls of the mould were too thick for my lung power to defeat, but it tired the same with the heart. I pierced a hole at the edge of the Anterior Vena Cava and tried to blow air in my half heart. It BARELY moved.. O_O
So with the help of my Fablab friends, we used the motor of the vacuum machine to blow air inside the molds. We had to be careful because the pressure of that motor is quite high but we did it very quick and it worked! Check the pics and videos, it was very fun. The last time we tried to inflate the heart, we popped it though :( I will need to fix it..


RESULTS & REFLECTIONS
I realized that the variance in thickness in the surface has a strong impact on how well the soft robot will inflate. So there was a leg of the gripper that didn't inflate as much as the others, and also parts of the heart that inflated a lot more than others.
I will have to check the design of the air channels and also pay closer attention to how to make the Ecoflex surface is very uniform.
I want to understand how to make the other part of the heart and how to assemble them together. Another thing would be to use fluids instead of air to inflate the heart.
You can find the Rhino file here. It would be great if you make it even better :)
